# Welcome to Metacom Space

{% hint style="info" %}
**Our Mission:** To help people make meaningful connections and experiences through events in the metaverse.
{% endhint %}

## About Us

[METACOM SPACE](https://metacom.space) is a decentralized metaverse platform with customizable virtual spaces that allows you to host and monetize your own events, or for other people or brands, who are seeking exposure at events.

The [META MORPHOSES](https://metamorphoses.vip) is a collection of 12,000 NFTs on the Ethereum blockchain that will allow people to become metaverse event planners with the mission to help people make more meaningful connections and experiences through events at Metacom Space.

## Quick links

{% content-ref url="/pages/8eLlmn4On7IugSUZbRHY" %}
[Our Pitch](/overview/our-pitch)
{% endcontent-ref %}

## Get Started

We've put together some helpful guides for you to get setup with our product quickly and easily.

{% content-ref url="/pages/nZtK4dnvmTYP1ByPSFBJ" %}
[Renters](/renters/getting-set-up)
{% endcontent-ref %}

{% content-ref url="/pages/zE8FJ3H2N13WfqbqrMkg" %}
[Exhibitors](/exhibitors/how-to-be-an-exhibitor)
{% endcontent-ref %}

{% content-ref url="/pages/p7LljikWEzP4OiPEaWyq" %}
[Visitors/Attendees](/visitors-attendees/getting-set-up)
{% endcontent-ref %}


# Our Pitch

## Intro

{% hint style="success" %}

### Our mission is to help people share more meaningful connections and experiences through enhanced communication and interaction.

{% endhint %}

As we transition into Web3, I learned building strong and engaged communities is important, especially with NFT projects, since they typically create a community first before they even build a product or provide any benefits.

Social media is a great tool for building communities through asynchronous conversations, where all members don’t have to be present at the same time, but live streaming provides a more personal and engaging way to build trust and engage with each other.

That’s why live-broadcasting platforms, like Zoom or Twitter Spaces, have become popular because they allow synchronous conversations that help connect us more by being able to share our tone of voice, facial expressions, body language, and our surroundings in real time.

But why are the relationships within communities still dissipating?


# Problem

The problem is that these platforms lack the ability for groups to communicate simultaneously.

They’re designed for one-way communication with only one speaker broadcasting to an audience at a time, which is why the number of speakers is always limited.

The metaverse serves as a potential solution but most platforms don’t prioritize community building or enable simultaneous conversations and interactions the same way we naturally do in real life.

This problem gets even worse when hosting events with larger groups of people, such as business conferences or music concerts.

We need more effective networking tools for big groups and communities.

Can the metaverse solve this problem?


# Competition

Many different NFT projects and startups are building high-quality metaverse platforms with advanced graphics and functionality but they require high-quality computers or expensive VR equipment, which can limit the number of potential users.

Even though some metaverse platforms can be accessed through cheap computers or mobile devices, they must sacrifice a better user experience with limited graphics and functionality.

Centralized servers are expensive to maintain and limit the number of users who can access the metaverse at the same time which can result in the virtual world appearing less populated and isolated and discouraging people from spending more time.

Our competitors and big companies focus mostly on building persistent virtual spaces that are always available. Hence, people easily get bored and lonely since the initial excitement of exploring a virtual world is temporary if they’re unable to experience meaningful social interactions.

That’s why most people aren’t hosting meetings or networking events in the metaverse because it’s too expensive and the experience is not practical enough to replace existing platforms or the real world.


# Solution

Our mission with Metacom Space is to help people share more meaningful connections and experiences by making it easy and affordable for anyone to host different types of events in a variety of interactive customizable venues in the metaverse and monetize them through sponsorships or ticket sales.

People are drawn to events because they gather people with similar interests over a limited period of time, making them an effective way of onboarding people to Web3.

Our metaverse uses text to communicate, video to connect real people behind the avatars, and spatial audio to hear positional sounds at different distances and directions within the virtual space for a more immersive interactive experience, which allows simultaneous conversations in real-time just like in the real world.

Our decentralized metaverse makes it very cost-effective and efficient to support more users who can access our metaverse at the same time through mobile phones, computers, or VR equipment.

Instead of buying expensive virtual real estate or creating your own virtual space, anyone can choose from a variety of venues that are customizable for different themes, types, and sizes of events from group meetings to big conferences.

Users can filter their search like real estate based on price, occupancy, and type of space. From there, users can customize their events with a variety of features that best suit their needs.

Metacom Space provides an effective networking solution for virtual events with people who share the same interests through enhanced communication and interaction.


# Product

We’ve partnered with Snippets, which is the technology used to build and customize our metaverse with exclusive features available on their platform only for Metacom Space to host events that will help populate their virtual worlds.

Our virtual venues fall under two categories: Private venues and Public venues.

Private venues are persistent virtual spaces for private events that can be accessed at any time and leased on a monthly basis with customization that can be saved, such as office spaces for meetings, classrooms for education, or NFT art galleries for artwork.

Public venues are temporary customizable virtual spaces for general attendees that can only be accessed during scheduled events and rented on an hourly basis, such as auditoriums for discussions, convention centers for conferences, or concert halls for music.

Each space can be customized for different themes and has features and functionality that are unique for different types and sizes of events with sponsorship and ticketing options for monetization tailored to each event.

To ensure successful events, we cater to:

* **Hosts -** We make it very easy and affordable for anyone to create events, choose from a variety of venues, acquire speakers, and monetize their events with advertising sponsors and exhibitors. They have a way to control the attendees by making public announcements about special attractions and crowd control features to ensure a great experience for everyone.
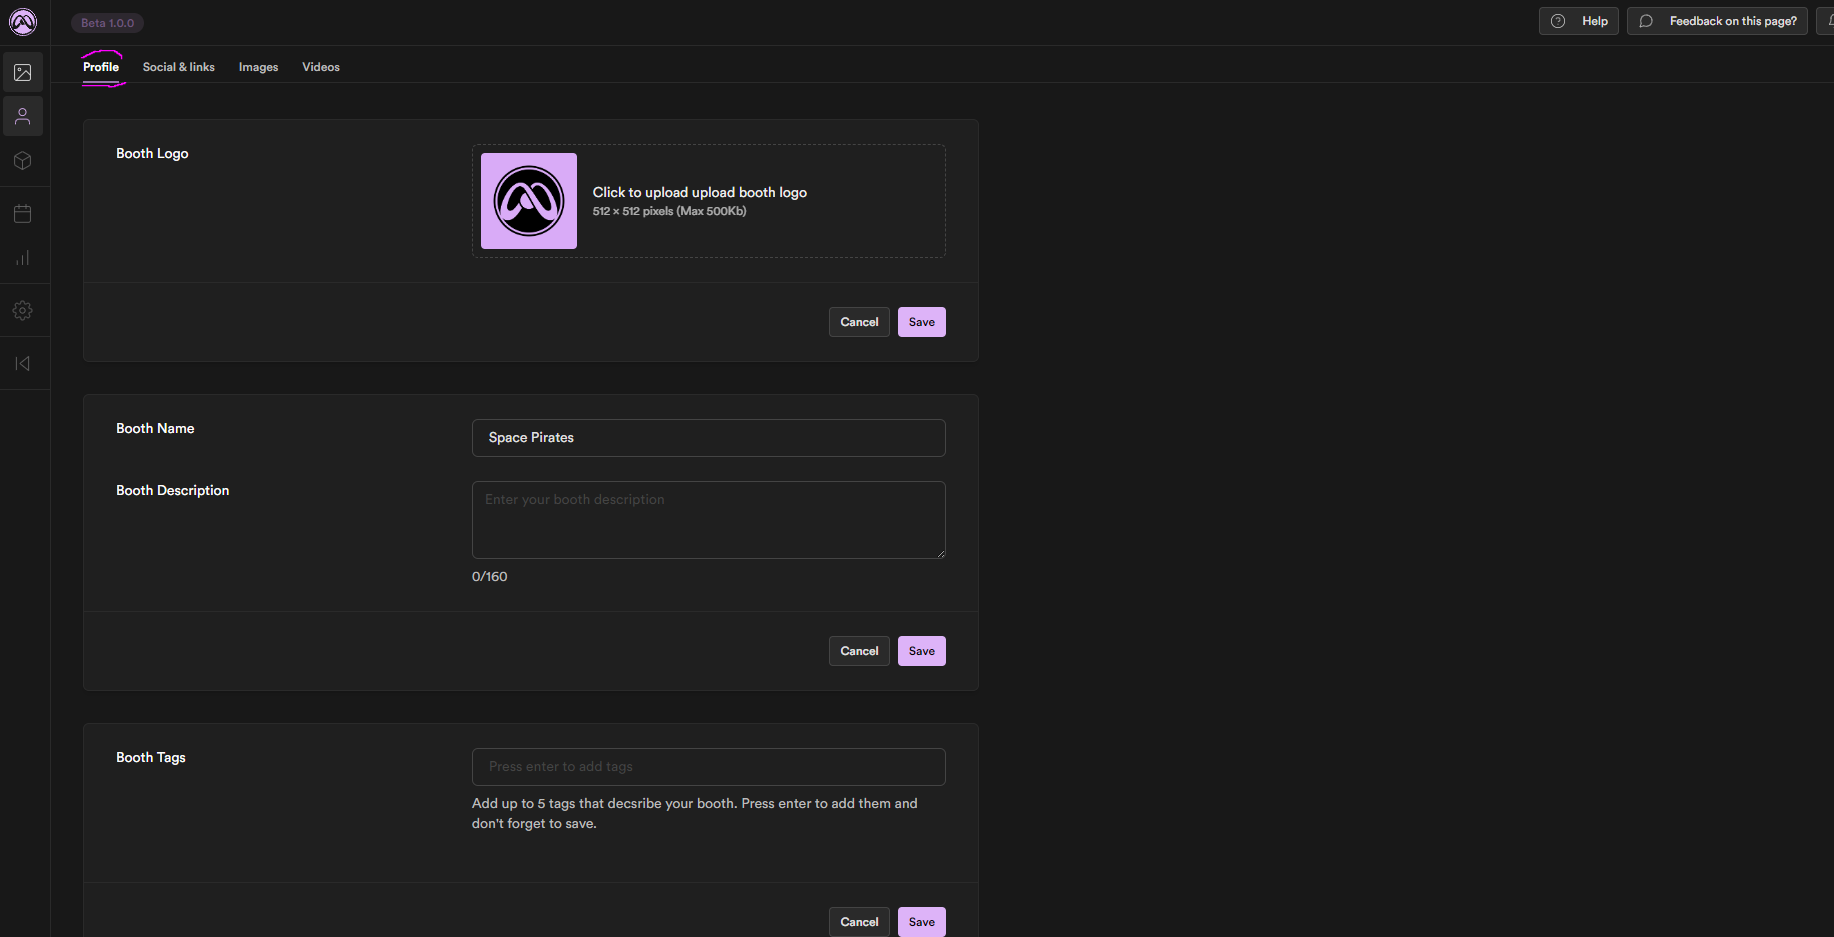
* **Exhibitors -** Organizations can seamlessly create and customize their booths with content, images, or videos and then request to be an exhibitor for any upcoming event. They can assign representatives at their booths to communicate with the attendees and use features to interact with their visitors.
* **Attendees -** Everyone can make more meaningful connections by being able to communicate with each other from their desktop (with/without a game controller), mobile phone, or VR headset. They can communicate through text, audio, and video which will help build trust with each other to make more meaningful connections.
* **Sponsors** - Organizations can apply and create a sponsor profile for hosts to consider for upcoming events. We make it simple to sponsor events and provide analytics to measure valuable exposure.
* **Speakers & Entertainers** - Hosts can invite speakers and entertainers to create a profile, which will allow any host to search, book, and pay them for their upcoming events.


# NFT Project

The Meta Morphoses is a collection of 12,000 NFTs on the Ethereum blockchain that are integrated into an exclusive affiliate program with NFT holders acting as event planners of Metacom Space to earn commission from referrals who want to host and monetize events in our metaverse.

Each of our PFPs, or character images connected to our NFTs, will have one of twelve different theme colors to symbolize various teams within our community. Each team will be able to participate cooperatively taking part in activities, games, and competitions to win rewards or earn tokens.

Our PFP characters look like superheroes because we're helping to save lives, by supporting [Start Day One](https://startdayone.org), our 501c3 nonprofit for mental health and suicide prevention.

Studies show that meaningful connections within communities help with maintaining mental wellness, so we plan to raise money and help people with uplifting inspirational events or educational seminars with licensed therapists and motivational speakers

We want to use the NFTs to create a virtual world for people to become more connected and explore the Metaverse, and ultimately, help decrease mental health stigma.

We're launching a metaverse minting process with our Meta Morphoses NFTs that guide you through an immersive experience with other people.

It starts by getting tickets for access and then arriving at the minting facility from a train ride across an island, entering the building lobby, walking through an NFT art gallery, attending a presentation and AMA session, and then minting the NFT that will transform your avatars into NFT PFP characters that give you access to the token-gated after-party.

Our metaverse minting process solves problems by decreasing NFT flippers with our ticketing feature, preventing scammers since they can't easily imitate our metaverse, preventing issues from bots since they can't automate avatars in the metaverse, and allowing people to communicate with each other during the minting process.


# Revenue Model

* **Rental Fees**\
  We generate revenue by charging rental fees based on the venues, number of attendees, amount of time for their events, and a percentage for each exhibitor booth and sponsored advertisement.
* **Subscription Fees**\
  We also generate recurring revenue through subscriptions for venues that do not require monetization for their events, such as business conference rooms for presentations or classrooms for educational seminars.
* **Sponsorships**\
  We take a percentage of sponsorships for events.
* **Ticket Fees**\
  We will be taking a percentage of sales for tickets sold for any events.&#x20;


# Go To Market

Our go-to-market strategy is to begin by demonstrating our metaverse platform by partnering with different startups and NFT projects to gain exposure by co-hosting events at public venues, where they can invite their communities to connect with each other.

We've integrated major event platforms, such as Twitter Spaces, LinkedIn, Meetup, Eventbrite, Facebook, and Instagram so that users can easily import events from these platforms to easily create a link to their own metaverse destination for their events, where their listeners or attendees can connect with each other.

Our affiliate program with the Meta Morphoses NFT holders who are incentivized to share their referral links or host their own events to generate income is part of our strategy to expand our sales team to help us acquire more customers and sponsors for our platform.

We’ll also be hosting our own networking events that will include hundreds of NFT projects as exhibitors to gain more exposure by inviting their members to attend and represent their community at their exhibitor booths.


# Traction

We're hosting the initial events on the platform by partnering with different startups and NFT projects as co-hosts at our event.


# Account


# Profile


# Profile Management

Learn how to manage and customize your user profile in Orbit to create your unique identity and connect with other users.

#### **Accessing Your User Profile** <a href="#accessing-your-user-profile" id="accessing-your-user-profile"></a>

* **Open the Menu:** Select the menu button, represented by three horizontal lines (☰), located in the top right corner of the interface. This will open the main menu.
* **Select Profile:** From the menu, choose the profile option, indicated by your avatar. This will open your user profile page.

#### **Editing Profile Information** <a href="#editing-profile-information" id="editing-profile-information"></a>

1. Click on the "Edit" button.
2. Update your profile in the shown fields.
3. Click "Save" to apply the changes.

#### **Profile Avatar** <a href="#profile-avatar" id="profile-avatar"></a>

* Your profile avatar is shown as your current character avatar. To change your character avatar, follow this guide [Change Your Avatar](https://help.orbitmultiverse.xyz/account/avatar/change-your-avatar).

### Benefits of Managing Your Profile: <a href="#benefits-of-managing-your-profile" id="benefits-of-managing-your-profile"></a>

* **Personal Identity:** Reflect your personality and interests by customizing your profile name and avatar.
* **Easy Recognition:** Help other users easily recognize and connect with you in Orbit.
* **Consistent Representation:** Ensure a consistent identity across the platform, enhancing your interactions with others.
* **User Engagement:** A personalized profile makes your interactions more engaging and meaningful within the community.
* **Updated Information:** Keep your profile information current for accurate representation in the virtual environment.


# Avatar


# Virtual Spaces

We provide our hosts and tenants with a variety of customizable virtual spaces for different types of events that can be monetized through sponsorships, exhibitors, and ticket sales.

### Types of Spaces

{% tabs %}
{% tab title="Networking" %}
These types of spaces are for gathering a group of people who share the same interests to meet and connect with each other.

Example of Events:

* Business Conferences
* Founders & Investors networking event
* Local singles meetup

Example of Spaces:

* Conference Centers
* Lounges
* Lofts
* Beaches
* Yachts
  {% endtab %}

{% tab title="Learning" %}
These types of spaces are for educating people about a specific subject.

For example:

* Homeschooling for teachers
* Seminars by experts
* Lectures by professors

Example of Spaces:

* Classrooms
* Lecture Halls
* Auditoriums
* Campuses
* Universities
  {% endtab %}

{% tab title="Entertaining" %}
These types of spaces are for entertaining people.

For example:

* Music concerts for celebrities
* Stand-up comedy shows&#x20;
* Movie premieres
* Rap battles
* Karaoke

Example of Spaces:

* Bars/Nightclubs
* Music Concert Stadiums
* Theatres
* Podcast Studios
  {% endtab %}

{% tab title="Working" %}
These types of spaces are for businesses or entrepreneurs who are interested in a virtual space to enhance their work experience.

For example:

* Office building for big companies to enhance collaboration among their employees.
* Office space for entrepreneurs to stand out with an immersive environment.
* Office space with conference rooms to enhance their meetings.

Example of Spaces:

* Individual Office Space
* Office Buildings for Employees
* Co-working Building Space
* Conference Rooms
  {% endtab %}

{% tab title="Selling" %}
These types of spaces are for companies who are looking to sell products or services to the attendees.

For example:

* Fashion shows for apparel companies to promote their new collection.
* Car shows to introduce a new model.
* Tradeshows for wholesale products

Example of Spaces:

* Art Galleries
* Fashion Runways
* Showrooms
* Convention Centers
  {% endtab %}

{% tab title="Living" %}
These types of spaces are for personal use to spend time with friends and family and express your personality and identity.

For example:

* Invite friends to watch TV.
* Gather guests and family during the holidays.
* Play games to stay connected with your relatives.

Example of Spaces:

* An apartment
* A house
* A mansion
* An estate
  {% endtab %}
  {% endtabs %}

### Types of Spaces

| Type of Space | Fees                    | Accessibility            |
| ------------- | ----------------------- | ------------------------ |
| Private Space | Monthly or Annual Lease | Accessible at All Times  |
| Public Space  | Hourly or Daily Rental  | Accessible During Events |

### Private Spaces

Private spaces in Metacom Space function similarly to leasing real estate like office spaces, apartments, or storefronts in the real world. These are customizable, persistent virtual venues leased on a long-term basis.&#x20;

Tenants pay monthly or annual fees for exclusive access to these virtual spaces, giving them the freedom to personalize the environment within the platform's capabilities.&#x20;

Whether it's setting up a virtual office for daily work, hosting regular meetings, or establishing a persistent presence in the metaverse, tenants have extensive control over the appearance and functionality of their space.&#x20;

The exclusive nature of these spaces allows tenants to create a stable and secure environment, akin to holding the keys to their own virtual property.

**Tenants**:

* **Exclusive Access:** Tenants enter into long-term lease agreements, providing them with exclusive control over their private virtual spaces.
* **Customization:** Tenants can customize their spaces using the platform's tools and assets to reflect their brand, preferences, and functional needs. This is more akin to decorating or configuring a space rather than renovating it.
* **Usage:** Ideal for ongoing activities such as running a virtual office, holding regular team meetings, or maintaining a consistent virtual presence for recurring events.

### Public Spaces

Public spaces in Metacom Space are akin to renting venues like convention centers, nightclubs, or event halls in the real world.&#x20;

These spaces are customizable within the platform's limitations and available for short-term rentals, perfect for hosting specific events such as conferences, workshops, or product launches.&#x20;

Renters pay hourly or daily fees for exclusive access during their scheduled event times.&#x20;

While these spaces don't offer the long-term exclusivity of private spaces, renters have full control and privacy during their rental period, just as they would when renting a physical venue for an event.

**Renters**:

* **Temporary Exclusive Access:** Renters book public spaces for short-term use, gaining exclusive access to the venue for the duration of their rental period.
* **Flexibility:** Public spaces are designed for events that require short-term, temporary use, similar to renting out a convention center or event hall for a day or a few hours.
* **Usage:** Suitable for hosting one-time events like conferences, social gatherings, product launches, or workshops where temporary and flexible space is needed.
* **Customization:** Renters can customize the appearance and functionality of the space for their event using the platform's provided tools and assets, similar to how one might decorate or set up a rented physical venue for an event.

In both private and public spaces, the concept of "customization" refers to the ability to alter the appearance, layout, and functionality of the space using the tools and assets provided by the Metacom Space platform.&#x20;

This could include changing color schemes, adding virtual furniture or decorations, setting up interactive elements, or configuring the space for specific activities.

The key difference is that private space tenants can maintain their customizations long-term, while public space renters customize for their specific event duration.


# Navigation & Controls


# Keyboard and Mouse Default Controls

Familiarize yourself with the default keyboard and mouse controls for navigating and interacting in Orbit.

### **Movement** <a href="#movement" id="movement"></a>

#### **Walk** <a href="#walk" id="walk"></a>

* Hold down `W`, `A`, `S`, `D` keys or the arrow keys to move forward, left, back, or right.

#### **Run** <a href="#run" id="run"></a>

* Hold down `Shift` and a direction key to run.

#### **Crouch** <a href="#crouch" id="crouch"></a>

* Hold down `C` to crouch in place, or with a direction key to crouch walk.

### **Camera** <a href="#camera" id="camera"></a>

#### **Rotate Camera** <a href="#rotate-camera" id="rotate-camera"></a>

* Click and hold the left mouse button to rotate the camera around your avatar.
* Alternatively, hold down and rotate using a trackpad on a laptop.
* The avatar will move in the direction the camera is facing, allowing you to turn while walking by rotating the camera.

#### **Zoom** <a href="#zoom" id="zoom"></a>

* Press `-` to zoom out and `+` to zoom in.
* Alternatively, use the scroll wheel on your mouse, or pinch in and out on a laptop trackpad.

#### **Toggle View** <a href="#toggle-view" id="toggle-view"></a>

* Press `V` to toggle between third-person (camera behind your avatar) and first-person (camera as the eyes of your avatar) views.

### **Communications** <a href="#communications" id="communications"></a>

#### **Public Text Chat** <a href="#public-text-chat" id="public-text-chat"></a>

* Press `Enter` to focus the Public Text Chat input. After typing your message, press `Enter` again to send the message. Press `Escape` to unfocus the chat.

### Interactions <a href="#interactions" id="interactions"></a>

#### Main Menu <a href="#main-menu" id="main-menu"></a>

* Press `M` to toggle the main menu open and closed.

#### Terminal Open <a href="#terminal-open" id="terminal-open"></a>

* Press `E` to interact with terminals. Some terminals may perform actions like playing and pausing music, whilst others may toggle UI elements.

### Emotes, Gestures, and Emoticons <a href="#emotes-gestures-and-emoticons" id="emotes-gestures-and-emoticons"></a>

1. **Open Emote Grid:** Hold down the `G` key to open the Emote Grid.
2. **Choose Emotes Type:** At the top of the Emote Grid, select the category you want to use.
3. **Select Emote:** Use your mouse to hover over the emote, gesture, or emoticon you want to use.
4. **Choose Emote:** Release the `G` key or click with your mouse, and the emote, gesture, or emoticon will play.

**Note:** Moving your avatar while emoting, gesturing, or showing an emoticon, except for traversal emotes, will stop the animation.


# Communications

[Public Communication](/overview/communications/public-communication): Orbit's public communication mimics real-life group interactions in a virtual setting, with options for users to adjust their experience. It includes spatial voice chat and public text messaging visible to all nearby users.

[Private Communication](/overview/communications/private-communication): Party Chat in Orbit allows up to 5 people to communicate privately through voice, video, text, and screen sharing within the virtual space, similar to a private conversation in a public setting.


# Public Communication

Orbit's public communication mimics real-life group interactions in a virtual setting, with options for users to adjust their experience.

## Communication Features

Let's talk about how you can chat with other people in Orbit. It's pretty cool because it mimics real-world conversations:

### **Voice Chat**

1. Look for the microphone icon in the top right corner of your screen.
2. Click it once to turn it on - it'll turn green when it's active.
3. Now, everyone nearby can hear you. But here's the awesome part - Orbit uses something called spatial audio.
   * **Approach the Group:** Move your avatar closer to the person or group you’re engaging with. Proximity increases audio clarity, making conversations easier to follow and more immersive.
   * **Face the Speaker:** Ensure your avatar is facing the users you are conversing with. Sound is perceived from your avatar’s head, so facing the source will provide the best audio experience.
   * **Distance to Reduce Volume:** To lower the audio volume, move your avatar away from the group. Increasing the distance will decrease the volume of the conversation, allowing you to control how much you hear.
   * **Change Orientation:** Turn your avatar’s head away from the source of the conversation to further reduce the volume. This technique can help minimize distractions and manage background noise.
4. To mute yourself, just click the mic icon again. Use this if you need to sneeze or if your dog starts barking!

### **Text Chat**

Sometimes you might want to type instead of talk. No problem!

1. Find the chat icon next to the microphone in the top right.
2. Click it to open the chat area.
3. Type your message and hit enter. Everyone in the space can see it.
4. This is great for asking questions during events or chatting if you don't have a mic.

## Settings

Orbit gives you superpowers to control your environment:

1. Click the menu icon in the top right, then select the Users icon.
2. You'll see a list of everyone who's in the same space as you.
3. Next to each name, you've got three icons:
   * An audio reload icon: Click this to reset the user's audio if you can't hear the user.
   * A chat bubble: Click this to hide their text messages.
   * A microphone: Click this to mute their audio.
   * A profile icon: Click this to make their avatar invisible.
   * This is super handy if someone's being disruptive or if there's just too much going on and you need to focus.
4. At the bottom, you can:
   * Adjust the volume of public voices in the virtual space.
   * Mute everyone’s microphone in the virtual space.

## **Additional Tips** <a href="#additional-tips" id="additional-tips"></a>

* **Temporary Muting:** Use the mute function during times when you need to focus or reduce background noise, and unmute when you want to re-engage in conversation.
* **User Effects:** Remember that hiding text, muting microphones, and hiding avatars only affects your experience. Everyone's experience remains the same, where they can still see text, hear other users, and view their avatars.

## Benefits

* **Spatial Audio Realism:** Experience conversations as if you were in the real world, with voices coming from the direction of the speakers.
* **Dynamic Sound Adjustment:** The audio system automatically adjusts the volume and direction of voices based on user movement and location.
* **Enhanced Group Discussions:** Engage in group conversations without interference from nearby discussions, thanks to the clarity and spatial separation of audio.
* **Immersive Interaction:** Enjoy a more natural and realistic interaction with other users in the virtual world, enhancing the overall user experience.


# Private Communication

Party Chat in Orbit allows up to 5 people to communicate privately through voice, video, text, and screen sharing within the virtual space, similar to a private conversation in a public setting.

## Party Chat

Think of Party Chat as your way to chat privately in Orbit similar to being on your mobile phone in the real-world. It's a way to have more intimate conversations with up to five people, so you can have personal conversations around other users without worrying about others overhearing in public.

This way, you can discuss confidential information, share personal news, or just chat and stay in touch in Orbit without anyone else listening in.

Here's how to get the party started:

1. Look for the menu icon in the top right corner of your screen.
2. Click on it and find the Party Chat icon.
3. Hit the "Create Party" button.
4. Now, tap the "Invite to Party" button at the bottom of the panel or the "+" button in the party chat window.

You can invite up to 5 members to join your exclusive virtual hangout. It's perfect for those times when you want a more intimate conversations away from the public.

## Communication Options:

Once you're in your Party Chat, you've got a bunch of ways to connect:

**Voice Chat**

1. Find the microphone icon at the bottom left of the party chat window.
2. Click it, and when it turns green, you're live! Your party can hear you crystal clear.

**Video Chat**

1. Next to the mic icon, you'll see the camera icon.
2. Click it, and boom - you're on camera when it turns green.

**Text Chat**

1. Maximize your Party Chat window by clicking the square icon in the top right corner.
2. Look for the text chat icon on the bottom left - it's the first one from the left.
3. Click it, and when it's green, you're ready to type away.
4. Just write your message and hit enter or the send button.

Text chat is super handy when you can't talk out loud or if you want to drop a link for everyone.

## Screen Sharing:

Got something cool on your screen you want to share? Here's how:

1. Make sure you're on a PC (sorry, mobile users!).
2. Maximize that Party Chat window.
3. Find the screen-share icon next to the camera icon.
4. Click it and select your entire screen, a specific application window, or even a particular browser tab and click "Share". The icon will turn green, and boom! Your party members can now see your screen.

This is perfect for showing off your latest project, watching videos together, or even collaborating on work stuff.

## Settings:

Orbit gives you the power to control your virtual environment:

1. Click the menu icon in the top right, then select the Party icon.
2. You'll see a list of every Party chat member.
3. Next to each name, you've got three icons:
   * A chat bubble: Click this to hide text messages from specific members.
   * A video camera: Click this to turn off individual video feeds.
   * A microphone: Click this to mute their audio.
   * A computer icon: Click this to hide someone’s screen share
4. At the bottom, you can:
   * Adjust the volume of your party members
   * Mute all party chat members while still hearing public sounds

## Benefits

* **Privacy:** You can talk privately with up to 5 people, like being on a phone surrounded by people, so you can talk to your friends secretly and the public users surrounding your avatar will not hear them.
* **Trust:** You can build trust by showing yourself with your facial expressions and body language through video.
* **Sharing:** You can share your screen or a live video of your surroundings to enhance communication so you can show a website or content that’s relevant to your conversation.
* **Focus:** You can concentrate on the conversation without distractions from other members next to your avatar in the virtual space, especially if you mute all of the public players in the party chat settings.
* **Stay Connected:** You can move around separately in different areas within the virtual space and still stay connected with members in the party chat.


# Settings

Learn how to configure communication settings by selecting the sources for your microphone and camera to ensure optimal audio and video quality during interactions.

## **Access Communication Settings:** <a href="#access-communication-settings" id="access-communication-settings"></a>

* **Open the Menu:** Select the menu button, represented by three horizontal lines (☰), located in the top right corner of the interface. This will open the main menu.
* **Select Settings:** From the menu, choose the settings option, indicated by the cog icon. Navigate to the Communication Settings section.

## **Select Microphone Source:** <a href="#select-microphone-source" id="select-microphone-source"></a>

* **Choose Microphone:** In the Communication Settings, find the microphone source option. Select the preferred microphone from the available list. This ensures that our platform uses the correct microphone for audio input, providing clear and effective communication.

## **Select Camera Source:** <a href="#select-camera-source" id="select-camera-source"></a>

* **Choose Camera:** In the Communication Settings, find the camera source option. Select the preferred camera from the available list. This ensures that our platform uses the correct camera for video input, ensuring optimal video quality during interactions.

## Benefits of Communication Settings: <a href="#benefits-of-communication-settings" id="benefits-of-communication-settings"></a>

* **Optimal Audio Quality:** Select the best microphone for your needs to ensure clear and effective communication with other users.
* **Improved Video Quality:** Choose the preferred camera to provide the best possible video quality during virtual interactions.
* **Customized Setup:** Configure your communication devices to suit your preferences and hardware capabilities, enhancing your overall experience.
* **Seamless Interactions:** Ensure that your audio and video inputs are correctly set up for smooth and uninterrupted communication.


# General Settings

Learn how to access and adjust general settings in Orbit, including toggling fullscreen mode and adjusting the HUD scale to customize your user interface experience.

#### **Access General Settings:** <a href="#access-general-settings" id="access-general-settings"></a>

* **Open the Menu:** Select the menu button, represented by three horizontal lines (☰), located in the top right corner of the interface. This will open the main menu.
* **Select Settings:** From the menu, choose the settings option, indicated by the cog icon. This will open the General Settings.

#### **Toggling Fullscreen Mode:** <a href="#toggling-fullscreen-mode" id="toggling-fullscreen-mode"></a>

* **Enable Fullscreen:** In the General Settings, find the fullscreen option and toggle it on to enter fullscreen mode. This will expand the application to fill your entire screen, providing an immersive experience.
* **Disable Fullscreen:** To exit fullscreen mode, toggle the fullscreen option off. This will return the application to windowed mode.
* **Note:** Fullscreen mode is not available on iOS devices. For a similar experience, we recommend adding Orbit to your Home Screen - [Install as an App](https://help.orbitmultiverse.xyz/miscellaneous/install-as-an-app).

#### **Adjusting HUD Scale:** <a href="#adjusting-hud-scale" id="adjusting-hud-scale"></a>

* **Increase HUD Scale:** In the General Settings, find the HUD scale option. Use the slider to increase the size of the HUD elements, making them larger and easier to read.
* **Decrease HUD Scale:** To make the HUD elements smaller, adjust the slider to decrease the HUD scale. This can free up screen space and provide a more compact interface.

### Benefits of General Settings: <a href="#benefits-of-general-settings" id="benefits-of-general-settings"></a>

* **Immersive Experience:** Toggle fullscreen mode to enhance your immersion in the virtual environment.
* **Customizable Interface:** Adjust the HUD scale to make interface elements larger or smaller based on your preference and needs.
* **Improved Accessibility:** Increasing the HUD scale can make text and icons easier to read for better accessibility.
* **Efficient Screen Use:** Decreasing the HUD scale can provide more screen space for the virtual environment, enhancing your overall experience.


# Graphic Settings

Learn how to adjust graphic settings in Orbit to optimize performance and visual quality based on your hardware capabilities.

## **Access Graphic Settings:** <a href="#access-graphic-settings" id="access-graphic-settings"></a>

* **Open the Menu:** Select the menu button, represented by three horizontal lines (☰), located in the top right corner of the interface. This will open the main menu.
* **Select Settings:** From the menu, choose the settings option, indicated by the cog icon. Navigate to the Graphic Settings section.

## **Performance Settings:** <a href="#performance-settings" id="performance-settings"></a>

* **Change Performance Levels:** You can adjust performance settings to Low, Medium, High, or Ultra. These settings control the overall quality of the graphics, including texture quality, draw distance, and detail levels. Lower settings can improve performance on less powerful hardware, while higher settings provide better visual quality.

## **Resolution Settings:** <a href="#resolution-settings" id="resolution-settings"></a>

* **Adjust Resolution:** Choose from 75%, 100%, 150%, 200%, or Auto. Resolution settings determine the clarity and detail of the graphics. Higher percentages provide sharper images but may reduce performance on lower-end systems. The Auto setting will automatically select the optimal resolution for your system.

## **Shadows Toggle :** <a href="#toggle-shadows" id="toggle-shadows"></a>

* **Enable/Disable Shadows:** Toggle shadows on or off. Enabling shadows enhances the realism and depth of the environment but can impact performance. Disabling shadows can improve performance, especially on lower-end hardware.

## **Post-Processing Toggle:** <a href="#toggle-post-processing" id="toggle-post-processing"></a>

* **Enable/Disable Post-Processing:** Toggle post-processing effects on or off. Post-processing adds effects such as bloom, motion blur, and color correction, enhancing visual appeal. Turning off post-processing can improve performance on systems with limited processing power.

## **Reflections Toggle:** <a href="#toggle-reflections" id="toggle-reflections"></a>

* **Enable/Disable Reflections:** Toggle reflections on or off. Reflections add realism to surfaces like water and glass by reflecting surrounding objects. Disabling reflections can significantly improve performance on lower-end systems.

### **Note:** Some higher-end settings may not be available if your PC/GPU is not capable of running high-end settings.

## Benefits of Graphic Settings: <a href="#benefits-of-graphic-settings" id="benefits-of-graphic-settings"></a>

* **Optimized Performance:** Adjust settings to ensure smooth performance on your device.
* **Enhanced Visual Quality:** Customize visual settings to achieve the best possible graphics your hardware can support.
* **User-Friendly Adjustments:** Easily toggle specific features on and off to find the right balance between performance and visual quality.
* **Automatic Optimization:** Use the Auto resolution setting for automatic adjustment to the optimal resolution for your system.


# Audio Settings

Learn how to adjust audio settings in Orbit to customize your sound experience, including turning sound on and off and adjusting volume levels for different audio components.

## **Access Audio Settings:** <a href="#access-audio-settings" id="access-audio-settings"></a>

* **Open the Menu:** Select the menu button, represented by three horizontal lines (☰), located in the top right corner of the interface. This will open the main menu.
* **Select Settings:** From the menu, choose the settings option, indicated by the cog icon. Navigate to the Audio Settings section.

## **Turn Sound On and Off:** <a href="#turn-sound-on-and-off" id="turn-sound-on-and-off"></a>

* **Toggle Sound:** Use the sound toggle switch to turn all sound on or off. This is useful for quickly muting the application when needed.

## **Adjust Ambience Volume:** <a href="#adjust-ambience-volume" id="adjust-ambience-volume"></a>

* **Use the Slider:** Adjust the ambience volume slider to increase or decrease the volume of background sounds and ambient noise. Higher volume provides a richer environmental sound, while lower volume can make background noise less intrusive.

## **Adjust Effects Volume:** <a href="#adjust-effects-volume" id="adjust-effects-volume"></a>

* **Use the Slider:** Adjust the effects volume slider to control the volume of in-game sound effects, such as footsteps, item interactions, and other actions. Higher volume enhances the prominence of sound effects, while lower volume reduces their impact.

## **Adjust Music/TV Volume:** <a href="#adjust-music-tv-volume" id="adjust-music-tv-volume"></a>

* **Use the Slider:** Adjust the music/TV volume slider to set the volume level for in-game music or media playing within the virtual environment. Higher volume makes the music or media more audible, while lower volume can make them less prominent.

## Benefits of Audio Settings: <a href="#benefits-of-audio-settings" id="benefits-of-audio-settings"></a>

* **Personalized Sound Experience:** Customize the audio settings to suit your personal preferences and create the ideal sound environment for your experience.
* **Quick Muting:** Easily turn all sound on or off with a single toggle switch for convenience.
* **Balanced Audio Levels:** Adjust the volume levels for different audio components to achieve the perfect balance between ambience, effects, and music/TV sounds.
* **Enhanced Focus:** Lower or mute specific audio elements to reduce distractions and enhance focus on important sounds or activities.


# Communication Settings

## **Access Communication Settings:** <a href="#access-communication-settings" id="access-communication-settings"></a>

* **Open the Menu:** Select the menu button, represented by three horizontal lines (☰), located in the top right corner of the interface. This will open the main menu.
* **Select Settings:** From the menu, choose the settings option, indicated by the cog icon. Navigate to the Communication Settings section.

## **Select Microphone Source:** <a href="#select-microphone-source" id="select-microphone-source"></a>

* **Choose Microphone:** In the Communication Settings, find the microphone source option. Select the preferred microphone from the available list. This ensures that Orbit uses the correct microphone for audio input, providing clear and effective communication.

## **Select Camera Source:** <a href="#select-camera-source" id="select-camera-source"></a>

* **Choose Camera:** In the Communication Settings, find the camera source option. Select the preferred camera from the available list. This ensures that Orbit uses the correct camera for video input, ensuring optimal video quality during interactions.

## Benefits of Communication Settings: <a href="#benefits-of-communication-settings" id="benefits-of-communication-settings"></a>

* **Optimal Audio Quality:** Select the best microphone for your needs to ensure clear and effective communication with other users.
* **Improved Video Quality:** Choose the preferred camera to provide the best possible video quality during virtual interactions.
* **Customized Setup:** Configure your communication devices to suit your preferences and hardware capabilities, enhancing your overall experience.
* **Seamless Interactions:** Ensure that your audio and video inputs are correctly set up for smooth and uninterrupted communication.


# Troubleshooting Issues

Resolve common issues with communications using this troubleshooting guide to ensure seamless and uninterrupted and effective communication.

{% tabs %}
{% tab title="Audio" %}

### **No Sound from Party Members** <a href="#no-sound-from-party-members" id="no-sound-from-party-members"></a>

* **Check Volume Settings:** Ensure the volume slider for Party Chat is turned up.
* **Verify Microphone Status:** Make sure the microphone icon for each of the members is not muted (red microphone icon).
* **Adjust Device Volume:** Check the volume settings on your device to ensure they are not muted or set too low.

### **Microphone Not Working** <a href="#microphone-not-working" id="microphone-not-working"></a>

* **Allow Microphone Access:** Ensure that the app has permission to access your microphone in your device settings - use this guide to check and set browser permissions [Browser Permissions](https://help.orbitmultiverse.xyz/miscellaneous/browser-permissions).
* **Select Correct Microphone:** Go to the [Communication settings](https://help.orbitmultiverse.xyz/settings/communication-settings) and make sure the correct microphone is selected.
* **Test Microphone:** Use your device’s audio settings to test the microphone and ensure it is functioning properly.

### Bad Audio Quality <a href="#bad-audio-quality" id="bad-audio-quality"></a>

* **Check Your Connection:** Ensure you have a stable internet connection. Poor connectivity can cause audio issues.
* **Update Drivers:** Make sure your audio drivers are up to date. Outdated drivers can cause compatibility issues and degrade audio quality.
* **Restart the Application:** Sometimes, restarting the application can resolve temporary glitches affecting audio quality.
* **Check for Interference:** Ensure there are no other applications or devices interfering with your audio. Close any unnecessary applications that might be using audio resources.
* **Test Your Microphone and Speakers:** Use the built-in testing features of your device's audio settings to ensure your microphone and speakers are functioning correctly.
* **Bluetooth Issues:** Bluetooth headsets can sometimes cause audio quality problems, especially when the microphone is in use. Try switching to a wired connection or using an external microphone instead of the built-in mic on your Bluetooth headset.
* **Power Management:** Ensure your device is not in low-power mode, as this can impact audio performance. Plug in your device or disable power-saving settings when using audio features extensively.

### **Echo or Feedback Issues** <a href="#echo-or-feedback-issues" id="echo-or-feedback-issues"></a>

* **Use Headphones:** Wearing headphones can help reduce echo and feedback.
* **Adjust Microphone Sensitivity:** Lower the sensitivity of your microphone in the Party Chat settings.
* **Check Speaker Placement:** Ensure your speakers and microphone are not too close to each other.

### **Intermittent Sound Issues** <a href="#intermittent-sound-issues" id="intermittent-sound-issues"></a>

* **Check Internet Connection:** Ensure you have a stable internet connection. Unstable connections can cause sound issues.
* **Close Unnecessary Applications:** Close other applications that might be using significant bandwidth or system resources.

### **Cannot Hear Public Sounds** <a href="#cannot-hear-public-sounds" id="cannot-hear-public-sounds"></a>

* **Check Mute Settings:** Ensure that the “mute public players” toggle is not enabled if you want to hear public sounds in the virtual space.
* **Adjust Audio Balance:** Check the audio balance settings on your device to ensure it is not favoring one type of sound over another.

### **Microphone Cuts Out** <a href="#microphone-cuts-out" id="microphone-cuts-out"></a>

* **Stable Connection:** Ensure your internet connection is stable to prevent interruptions in voice chat.
* **Update Drivers:** Make sure your audio drivers are up to date on your device.
* **Reduce Background Noise:** Move to a quieter location or use noise-canceling microphones to reduce interference.

### **Audio Not Playing Through Speakerphone on Mobile Devices** <a href="#audio-not-playing-through-speakerphone-on-mobile-devices" id="audio-not-playing-through-speakerphone-on-mobile-devices"></a>

* **Check Silent Mode:** Ensure that your device is not in silent mode.
* **Use Headset or Earbuds:** For the best quality audio, use a headset, earbuds, or headphones.
  {% endtab %}

{% tab title="Video" %}

### **No Camera from Party Members** <a href="#no-camera-from-party-members" id="no-camera-from-party-members"></a>

* **Verify Camera Status:** Make sure the camera icon for each of the members is not disabled (red camera icon).
* **Check Device Camera:** Ensure your device’s camera is functioning properly and is not blocked or covered.

### **Camera Not Working** <a href="#camera-not-working" id="camera-not-working"></a>

* **Allow Camera Access:** Ensure that the app has permission to access your camera in your device settings - use this guide to check and set browser permissions [Browser Permissions](https://help.orbitmultiverse.xyz/miscellaneous/browser-permissions).
* **Select Correct Camera:** Go to the Party Chat settings and make sure the correct camera is selected.
* **Test Camera:** Use your device’s camera settings to test the camera and ensure it is functioning properly.

### **Poor Video Quality** <a href="#poor-video-quality" id="poor-video-quality"></a>

* **Check Internet Connection:** Ensure you have a stable and fast internet connection. Unstable connections can cause poor video quality.
* **Close Unnecessary Applications:** Close other applications that might be using significant bandwidth or system resources.

### **Lagging or Freezing Video** <a href="#lagging-or-freezing-video" id="lagging-or-freezing-video"></a>

* **Stable Connection:** Ensure your internet connection is stable to prevent lagging or freezing.
* **Update the App:** Ensure you are using the latest version of the Orbit app.
* **Optimize Device Performance:** Close background applications and clear unnecessary files to optimize your device’s performance.

### **Video Cuts Out** <a href="#video-cuts-out" id="video-cuts-out"></a>

* **Stable Connection:** Ensure your internet connection is stable to prevent interruptions in video chat.
* **Update Drivers:** Make sure your video drivers are up to date on your device.
* **Check for Interference:** Ensure there are no other applications or devices interfering with your video chat.
  {% endtab %}

{% tab title="Text" %}

### **Messages Not Sending** <a href="#messages-not-sending" id="messages-not-sending"></a>

* **Check Internet Connection:** Ensure you have a stable internet connection.
* **Refresh Chat Window:** Try refreshing the chat window or reopening the Party Chat.

### **Cannot See Messages** <a href="#cannot-see-messages" id="cannot-see-messages"></a>

* **Check Hidden Messages:** Ensure that you have not hidden messages from specific users by pressing the text chat icon next to their names.
* **Scroll Through Chat:** Scroll up or down to check for missed messages.
* **Adjust Window Size:** Ensure the chat window is maximized or expanded to view all messages.

### **Delayed Messages** <a href="#delayed-messages" id="delayed-messages"></a>

* **Stable Connection:** Ensure your internet connection is stable to prevent delays.
* **Close Unnecessary Applications:** Close other applications that might be using significant bandwidth or system resources.

### **Spam or Offensive Messages** <a href="#spam-or-offensive-messages" id="spam-or-offensive-messages"></a>

* **Hide Messages:** Press the text chat icon next to the offending user’s name to hide their messages.
  {% endtab %}

{% tab title="Screensharing" %}

### **Screen Share Not Working** <a href="#screen-share-not-working" id="screen-share-not-working"></a>

* **Allow Screen Share Access:** Ensure that the app has permission to share your screen in your device settings - use this guide to check and set browser permissions [Browser Permissions](https://help.orbitmultiverse.xyz/miscellaneous/browser-permissions).
* **Select Correct Screen:** Ensure you are selecting the correct screen or application window to share.
* **Check Device Settings:** Ensure your device settings allow screen sharing.

### **Poor Screen Share Quality** <a href="#poor-screen-share-quality" id="poor-screen-share-quality"></a>

* **Check Internet Connection:** Ensure you have a stable and fast internet connection. Unstable connections can cause poor screen share quality.
* **Close Unnecessary Applications:** Close other applications that might be using significant bandwidth or system resources.
* **Adjust Screen Resolution:** Lower the screen resolution to improve performance.

### **Lagging or Freezing Screen Share** <a href="#lagging-or-freezing-screen-share" id="lagging-or-freezing-screen-share"></a>

* **Stable Connection:** Ensure your internet connection is stable to prevent lagging or freezing.
* **Update the App:** Ensure you are using the latest version of the Orbit app.
* **Optimize Device Performance:** Close background applications and clear unnecessary files to optimize your device’s performance.

### **Cannot See Shared Screen** <a href="#cannot-see-shared-screen" id="cannot-see-shared-screen"></a>

* **Check Hidden Screen Share:** Ensure that you have not hidden the screen share from specific users by pressing the screen-share icon next to their names.
* **Refresh Chat Window:** Try refreshing the chat window or reopening the Party Chat.
* **Adjust Window Size:** Ensure the chat window is maximized or expanded to view the shared screen.
  {% endtab %}
  {% endtabs %}


# Browser Permissions

Learn how to change microphone, sound, and camera settings in various browsers to ensure proper functionality and permissions for Orbit.

### Desktop Browsers <a href="#desktop-browsers" id="desktop-browsers"></a>

#### Google Chrome (Recommended) <a href="#google-chrome-recommended" id="google-chrome-recommended"></a>

**Microphone Settings:**

1. Click the icon to the left of the URL in the address bar.
2. Select "Site settings."
3. Find “Microphone” near the top of the page.
4. Select the drop-down menu and change the permission to "Allow."

**Sound Settings:**

1. Click the icon to the left of the URL in the address bar.
2. Select "Site settings."
3. Find “Sound” near the top of the page.
4. Select the drop-down menu and change the permission to "Allow."

**Camera Settings:**

1. Click the icon to the left of the URL in the address bar.
2. Select "Site settings."
3. Find “Camera” near the top of the page.
4. Select the drop-down menu and change the permission to "Allow."

***

#### Microsoft Edge <a href="#microsoft-edge" id="microsoft-edge"></a>

**Microphone Settings:**

1. Click the lock icon on the left of the URL.
2. Select "Permissions for this site" from the dropdown menu.
3. At the top of the page find “Microphone.”
4. On the right, select the drop-down menu and select “Allow.”

**Sound Settings:**

1. Click the three dots in the top right corner of Microsoft Edge.
2. Select "Settings."
3. On the left, find and select “Cookies and site permissions.”
4. Scroll down to find and select “Media autoplay.”
5. Select “Add” and enter the Orbit link: <https://orbitmultiverse.xyz/>

**Camera Settings:**

1. Click the lock icon on the left of the URL.
2. Select "Permissions for this site" from the dropdown menu.
3. At the top of the page find “Camera.”
4. On the right, select the drop-down menu and select “Allow.”

***

#### Brave <a href="#brave" id="brave"></a>

**Microphone Settings:**

1. Click the lock icon on the left of the URL.
2. Select "Site settings" from the dropdown menu.
3. Find “Microphone.”
4. On the right, select the drop-down menu and select “Allow.”

**Sound Settings:**

1. Click the lock icon on the left of the URL.
2. Select "Site settings" from the dropdown menu.
3. Find “Sound.”
4. On the right, select the drop-down menu and select “Allow.”

**Camera Settings:**

1. Click the lock icon on the left of the URL.
2. Select "Site settings" from the dropdown menu.
3. Find “Camera.”
4. On the right, select the drop-down menu and select “Allow.”

***

#### Firefox <a href="#firefox" id="firefox"></a>

**Microphone Settings:**

1. Click the menu button (three horizontal lines) at the top-right corner.
2. Select "Settings" from the dropdown menu.
3. In the Settings tab, select "Privacy & Security" from the sidebar.
4. Scroll down to the "Permissions" section.
5. Click the "Settings..." button for Microphone.
6. Enter the Orbit link: <https://orbitmultiverse.xyz/>
7. Select "Save changes."

**Sound Settings:**

1. Click the menu button (three horizontal lines) at the top-right corner.
2. Select "Settings" from the dropdown menu.
3. In the Settings tab, select "Privacy & Security" from the sidebar.
4. Scroll down to the "Permissions" section.
5. Click the "Settings..." button for Speaker Selection.
6. Enter the Orbit link: <https://orbitmultiverse.xyz/>
7. Select "Save changes."

**Camera Settings:**

1. Click the menu button (three horizontal lines) at the top-right corner.
2. Select "Settings" from the dropdown menu.
3. In the Settings tab, select "Privacy & Security" from the sidebar.
4. Scroll down to the "Permissions" section.
5. Click the "Settings..." button for Camera.
6. Enter the Orbit link: <https://orbitmultiverse.xyz/>
7. Select "Save changes."

***

#### Opera <a href="#opera" id="opera"></a>

**Microphone Settings:**

1. Click the lock icon on the left of the URL.
2. Select "Site settings" from the dropdown menu.
3. Find “Microphone.”
4. On the right, select the drop-down menu and select “Allow.”

**Sound Settings:**

1. Click the lock icon on the left of the URL.
2. Select "Site settings" from the dropdown menu.
3. Find “Sound.”
4. On the right, select the drop-down menu and select “Allow.”

**Camera Settings:**

1. Click the lock icon on the left of the URL.
2. Select "Site settings" from the dropdown menu.
3. Find “Camera.”
4. On the right, select the drop-down menu and select “Allow.”

***

#### Opera GX <a href="#opera-gx" id="opera-gx"></a>

**Microphone Settings:**

1. Click the lock icon on the left of the URL.
2. Select "Site settings" from the dropdown menu.
3. Find “Microphone.”
4. On the right, select the drop-down menu and select “Allow.”

**Sound Settings:**

1. Click the lock icon on the left of the URL.
2. Select "Site settings" from the dropdown menu.
3. Find “Sound.”
4. On the right, select the drop-down menu and select “Allow.”

**Camera Settings:**

1. Click the lock icon on the left of the URL.
2. Select "Site settings" from the dropdown menu.
3. Find “Camera.”
4. On the right, select the drop-down menu and select “Allow.”

***

#### Safari <a href="#safari" id="safari"></a>

**Microphone Settings:**

1. Open Safari and navigate to the website for which you want to change the microphone settings.
2. Click "Safari" in the top menu bar.
3. Select "Settings for This Website..."
4. In the pop-up window, find the "Microphone" option.
5. Click the dropdown menu next to "Microphone" and select "Allow."

**Sound Settings:**

1. Open Safari and navigate to the website for which you want to change the sound settings.
2. Click "Safari" in the top menu bar.
3. Select "Settings for This Website..."
4. In the pop-up window, find the "Auto-Play" option.
5. Click the dropdown menu next to "Auto-Play" and select "Allow All Auto-Play."

**Camera Settings:**

1. Open Safari and navigate to the website for which you want to change the camera settings.
2. Click "Safari" in the top menu bar.
3. Select "Settings for This Website..."
4. In the pop-up window, find the "Camera" option.
5. Click the dropdown menu next to "Camera" and select "Allow."

***

### Mobile/Tablet Browsers <a href="#mobile-tablet-browsers" id="mobile-tablet-browsers"></a>

#### Google Chrome (Recommended) <a href="#google-chrome-recommended-1" id="google-chrome-recommended-1"></a>

**Microphone Settings:**

1. Open the web page tab.
2. Tap the three-dot icon in the top right.
3. Select "Settings."
4. Scroll down to find "Site settings."
5. Find and select "Microphone."
6. Turn off the option to allow the sites to "Ask first before allowing sites to use your microphone."

**Sound Settings:**

1. Open the web page tab.
2. Tap the three-dot icon in the top right.
3. Select "Settings."
4. Scroll down to find "Site settings."
5. Find and select "Sound."
6. Turn on the option to "Allow sites to play sound."

**Camera Settings:**

1. Open the web page tab.
2. Tap the three-dot icon in the top right.
3. Select "Settings."
4. Scroll down to find "Site settings."
5. Find and select "Camera."
6. Turn off the option to allow the sites to "Ask first before allowing sites to use your camera."

***

#### **Microsoft Edge** <a href="#microsoft-edge-1" id="microsoft-edge-1"></a>

**Microphone Settings:**

1. Tap the three horizontal lines in the bottom right of the screen.
2. Select "Settings."
3. Select "Privacy and security."
4. Select "Site settings."
5. Select "Microphone."
6. Turn off the option to allow the sites to "Ask first before allowing sites to use your microphone."

   **If this does not work, follow these steps:**

   1. Tap "Android settings" under where you have the option to allow sites to ask first (from the previous step 6).
   2. Select "Permissions."
   3. Select "Microphone."
   4. Then select "Allow only while using the app."

**Sound Settings:**

1. Tap the three horizontal lines in the bottom right of the screen.
2. Select "Settings."
3. Select "Privacy and security."
4. Select "Site settings."
5. Scroll down to find and select "Sound."
6. Turn on the option to "Allow sites to play sound."

**Camera Settings:**

1. Tap the three horizontal lines in the bottom right of the screen.
2. Select "Settings."
3. Select "Privacy and security."
4. Select "Site settings."
5. Select "Camera."
6. Turn off the option to allow the sites to "Ask first before allowing sites to use your camera."

   **If this does not work, follow these steps:**

   1. Tap "Android settings" under where you have the option to allow sites to ask first (from the previous step 6).
   2. Select "Permissions."
   3. Select "Camera."
   4. Then select "Allow only while using the app."

***

#### **Brave** <a href="#brave-1" id="brave-1"></a>

**Microphone Settings:**

1. Tap the three dots in the bottom right.
2. Scroll down to find and select "Settings."
3. Scroll down to find and select "Site settings."
4. Select "Microphone."
5. Turn off the option "Ask first before allowing sites to use your microphone."

**Sound Settings:**

1. Tap the three dots in the bottom right.
2. Scroll down to find and select "Settings."
3. Scroll down to find and select "Site settings."
4. Scroll down to find and select "Auto-play."
5. Turn off the setting to "Allow sites to play muted videos."

**Camera Settings:**

1. Tap the three dots in the bottom right.
2. Scroll down to find and select "Settings."
3. Scroll down to find and select "Site settings."
4. Select "Camera."
5. Turn off the option "Ask first before allowing sites to use your camera."

***

#### **Firefox** <a href="#firefox-1" id="firefox-1"></a>

**Microphone Settings:**

1. Tap the three dots in the top right.
2. Select “Settings.”
3. Scroll down to find and select “Site permissions.”
4. Select “Microphone.”
5. Turn off “Ask to allow.”

**Sound Settings:**

1. Tap the three dots in the top right.
2. Select “Settings.”
3. Scroll down to find and select “Site permissions.”
4. Select “Auto play back.”
5. Turn on “Allow audio and video.”

**Camera Settings:**

1. Tap the three dots in the top right.
2. Select “Settings.”
3. Scroll down to find and select “Site permissions.”
4. Select “Camera.”
5. Turn off “Ask to allow.”

   **If this does not work, follow these steps:**

   1. Tap "Go to settings" under where you have the option to allow sites to ask first (from the previous step 6).
   2. Select "Permissions."
   3. Select "Camera."
   4. Then select "Allow only while using the app."

***

#### **Opera** <a href="#opera-1" id="opera-1"></a>

**Microphone Settings:**

1. In the bottom right, tap the profile icon.
2. Tap the settings cog icon on the top right of the pop-up.
3. Find and select “Privacy and security.”
4. Select “Site permissions.”
5. Select “Microphone.”
6. Turn off “Ask every time” setting.

**Sound Settings:**

1. In the bottom right, tap the profile icon.
2. Tap the settings cog icon on the top right of the pop-up.
3. Find and select “Privacy and security.”
4. Select “Site permissions.”
5. Select “Sound.”
6. Turn off “Ask every time” setting.

**Camera Settings:**

1. In the bottom right, tap the profile icon.
2. Tap the settings cog icon on the top right of the pop-up.
3. Find and select “Privacy and security.”
4. Select “Site permissions.”
5. Select “Camera.”
6. Turn off “Ask every time” setting.

***

#### **Safari** <a href="#safari-1" id="safari-1"></a>

**Microphone Settings:**

1. Open Safari and navigate to the website for which you want to change the microphone settings.
2. Tap the "aA" icon in the address bar.
3. Select "Website Settings."
4. In the pop-up window, find the "Microphone" option.
5. Tap on the "Microphone" option and select "Allow."

**Sound Settings:**

1. Open Safari and navigate to the website for which you want to change the sound settings.
2. Tap the "aA" icon in the address bar.
3. Select "Website Settings."
4. In the pop-up window, find the "Auto-Play" option.
5. Tap on the "Auto-Play" option and select "Allow All Auto-Play."

**Camera Settings:**

1. Open Safari and navigate to the website for which you want to change the camera settings.
2. Tap the "aA" icon in the address bar.
3. Select "Website Settings."
4. In the pop-up window, find the "Camera" option.
5. Tap on the "Camera" option and select "Allow."


# App Installation

Learn how to install Orbit as an app or add it to your home screen on your desktop and mobile browsers for quick access and a seamless experience, without the distraction of the browser interface.

### Desktop Browsers <a href="#desktop-browsers" id="desktop-browsers"></a>

#### Google Chrome (Recommended) <a href="#google-chrome-recommended" id="google-chrome-recommended"></a>

1. Open Chrome and navigate to the Orbit website.
2. Tap the three-dot menu icon in the top right corner.
3. Select "Save and Share."
4. Select "Install page as app..."
5. Enter a name for the shortcut, then click "Install."
6. The Orbit icon will now appear on your home screen.

***

#### Microsoft Edge <a href="#microsoft-edge" id="microsoft-edge"></a>

1. Open Edge and navigate to the Orbit website.
2. Tap the three-dot menu icon in the bottom centre of the screen.
3. Select "Add to Home screen."
4. Select "Apps."
5. Choose "Orbit App."
6. Click on Install.
7. Choose "Pin to Taskbar", "Pin to Start", or "Create Desktop Shortcut."
8. Click on Allow.
9. The Orbit icon will now appear on your home screen.

***

#### Brave <a href="#brave" id="brave"></a>

1. Open Brave and navigate to the Orbit website.
2. Tap the three-line menu icon in the top right corner.
3. Select "Install Orbit..."
4. On the popup, click "Install."
5. The Orbit icon will now appear on your home screen.

***

#### Firefox <a href="#firefox" id="firefox"></a>

* This feature is not available on Firefox for desktop.

***

#### Opera <a href="#opera" id="opera"></a>

* This feature is not available on Opera for desktop.

***

#### Opera GX <a href="#opera-gx" id="opera-gx"></a>

* This feature is not available on Opera GX for desktop.

***

#### Safari - MacOS <a href="#safari-macos" id="safari-macos"></a>

1. Open Safari and navigate to the Orbit website.
2. Tap the share icon (a square with an arrow pointing up) at the bottom of the screen.
3. Select "Add to Dock."
4. Enter a name for the shortcut, then tap "Add."
5. The Orbit icon will now appear on your MacOS dock.

***

### Mobile Browsers <a href="#mobile-browsers" id="mobile-browsers"></a>

#### **Google Chrome (Recommended)** <a href="#google-chrome-recommended-1" id="google-chrome-recommended-1"></a>

1. Open Chrome and navigate to the Orbit website.
2. Tap the three-dot menu icon (share icon on IOS) to the right-side of the URL bar.
3. Select "Add to Home screen."
4. Tap "Install" on Android, or on IOS enter a name for the shortcut, then tap "Add."
5. The Orbit icon will now appear on your home screen.

***

#### **Microsoft Edge** <a href="#microsoft-edge-1" id="microsoft-edge-1"></a>

1. Open Edge and navigate to the Orbit website.
2. Tap the three-line menu icon in the top-right on Android, bottom-right on IOS.
3. Tap the share icon.
4. Select "Add to Phone" on Android, or on IOS "Add to Home screen."
5. Tap "Install" on Android, or on IOS enter a name for the shortcut, then tap "Add."
6. The Orbit icon will now appear on your home screen.

***

#### **Brave** <a href="#brave-1" id="brave-1"></a>

1. Open Brave and navigate to the Orbit website.
2. Tap the three-dot menu icon in the top-right on Android, bottom-right on IOS.
3. Select "Add to Home screen."
4. Tap "Install" on Android, or on IOS enter a name for the shortcut, then tap "Add."
5. The Orbit icon will now appear on your home screen.

**Note:** This feature is not available on Brave for IOS.

***

#### **Firefox** <a href="#firefox-1" id="firefox-1"></a>

1. Open Firefox and navigate to the Orbit website.
2. Tap the three-dot menu icon on Android, three-line on IOS, in the bottom-right corner.
3. Tap the share icon (skip step on Android).
4. Select "Add to Home screen."
5. Enter a name for the shortcut, then tap "Add."
6. The Orbit icon will now appear on your home screen.

***

#### **Opera** <a href="#opera-1" id="opera-1"></a>

1. Open Opera and navigate to the Orbit website.
2. Tap the three-dot menu icon at the bottom-right of the screen.
3. Select from the "Add To" drop-down.
4. Select "Home Screen".
5. Enter a name for the shortcut, then tap "Add."
6. The Orbit icon will now appear on your home screen.

**Note:** This feature is not available on Opera GX for IOS.

***

#### **Opera GX** <a href="#opera-gx-1" id="opera-gx-1"></a>

1. Open Opera GX and navigate to the Orbit website.
2. Tap the Opera logo icon at the bottom-right of the screen.
3. Tap the star icon.
4. Select "Home Screen".
5. Enter a name for the shortcut, then tap "Add."
6. The Orbit icon will now appear on your home screen.

**Note:** This feature is not available on Opera GX for IOS.

***

#### **Safari - IOS** <a href="#safari-ios" id="safari-ios"></a>

1. Open Safari and navigate to the Orbit website.
2. Tap the share icon at the bottom of the screen.
3. Select "Add to Home Screen."
4. Enter a name for the shortcut, then tap "Add."
5. The Orbit icon will now appear on your home screen.


# Browser Permissions

Learn how to change microphone, sound, and camera settings in various browsers to ensure proper functionality and permissions for Metacom Space.

## Desktop Browsers <a href="#desktop-browsers" id="desktop-browsers"></a>

### Google Chrome (Recommended) <a href="#google-chrome-recommended" id="google-chrome-recommended"></a>

**Microphone Settings:**

1. Click the icon to the left of the URL in the address bar.
2. Select "Site settings."
3. Find “Microphone” near the top of the page.
4. Select the drop-down menu and change the permission to "Allow."

**Sound Settings:**

1. Click the icon to the left of the URL in the address bar.
2. Select "Site settings."
3. Find “Sound” near the top of the page.
4. Select the drop-down menu and change the permission to "Allow."

**Camera Settings:**

1. Click the icon to the left of the URL in the address bar.
2. Select "Site settings."
3. Find “Camera” near the top of the page.
4. Select the drop-down menu and change the permission to "Allow."

***

### Microsoft Edge <a href="#microsoft-edge" id="microsoft-edge"></a>

**Microphone Settings:**

1. Click the lock icon on the left of the URL.
2. Select "Permissions for this site" from the dropdown menu.
3. At the top of the page find “Microphone.”
4. On the right, select the drop-down menu and select “Allow.”

**Sound Settings:**

1. Click the three dots in the top right corner of Microsoft Edge.
2. Select "Settings."
3. On the left, find and select “Cookies and site permissions.”
4. Scroll down to find and select “Media autoplay.”
5. Select “Add” and enter the Orbit link: <https://orbitmultiverse.xyz/>

**Camera Settings:**

1. Click the lock icon on the left of the URL.
2. Select "Permissions for this site" from the dropdown menu.
3. At the top of the page find “Camera.”
4. On the right, select the drop-down menu and select “Allow.”

***

### Brave <a href="#brave" id="brave"></a>

**Microphone Settings:**

1. Click the lock icon on the left of the URL.
2. Select "Site settings" from the dropdown menu.
3. Find “Microphone.”
4. On the right, select the drop-down menu and select “Allow.”

**Sound Settings:**

1. Click the lock icon on the left of the URL.
2. Select "Site settings" from the dropdown menu.
3. Find “Sound.”
4. On the right, select the drop-down menu and select “Allow.”

**Camera Settings:**

1. Click the lock icon on the left of the URL.
2. Select "Site settings" from the dropdown menu.
3. Find “Camera.”
4. On the right, select the drop-down menu and select “Allow.”

***

### Firefox <a href="#firefox" id="firefox"></a>

**Microphone Settings:**

1. Click the menu button (three horizontal lines) at the top-right corner.
2. Select "Settings" from the dropdown menu.
3. In the Settings tab, select "Privacy & Security" from the sidebar.
4. Scroll down to the "Permissions" section.
5. Click the "Settings..." button for Microphone.
6. Enter the Orbit link: <https://orbitmultiverse.xyz/>
7. Select "Save changes."

**Sound Settings:**

1. Click the menu button (three horizontal lines) at the top-right corner.
2. Select "Settings" from the dropdown menu.
3. In the Settings tab, select "Privacy & Security" from the sidebar.
4. Scroll down to the "Permissions" section.
5. Click the "Settings..." button for Speaker Selection.
6. Enter the Orbit link: <https://orbitmultiverse.xyz/>
7. Select "Save changes."

**Camera Settings:**

1. Click the menu button (three horizontal lines) at the top-right corner.
2. Select "Settings" from the dropdown menu.
3. In the Settings tab, select "Privacy & Security" from the sidebar.
4. Scroll down to the "Permissions" section.
5. Click the "Settings..." button for Camera.
6. Enter the Orbit link: <https://orbitmultiverse.xyz/>
7. Select "Save changes."

***

### Opera <a href="#opera" id="opera"></a>

**Microphone Settings:**

1. Click the lock icon on the left of the URL.
2. Select "Site settings" from the dropdown menu.
3. Find “Microphone.”
4. On the right, select the drop-down menu and select “Allow.”

**Sound Settings:**

1. Click the lock icon on the left of the URL.
2. Select "Site settings" from the dropdown menu.
3. Find “Sound.”
4. On the right, select the drop-down menu and select “Allow.”

**Camera Settings:**

1. Click the lock icon on the left of the URL.
2. Select "Site settings" from the dropdown menu.
3. Find “Camera.”
4. On the right, select the drop-down menu and select “Allow.”

***

### Opera GX <a href="#opera-gx" id="opera-gx"></a>

**Microphone Settings:**

1. Click the lock icon on the left of the URL.
2. Select "Site settings" from the dropdown menu.
3. Find “Microphone.”
4. On the right, select the drop-down menu and select “Allow.”

**Sound Settings:**

1. Click the lock icon on the left of the URL.
2. Select "Site settings" from the dropdown menu.
3. Find “Sound.”
4. On the right, select the drop-down menu and select “Allow.”

**Camera Settings:**

1. Click the lock icon on the left of the URL.
2. Select "Site settings" from the dropdown menu.
3. Find “Camera.”
4. On the right, select the drop-down menu and select “Allow.”

***

### Safari <a href="#safari" id="safari"></a>

**Microphone Settings:**

1. Open Safari and navigate to the website for which you want to change the microphone settings.
2. Click "Safari" in the top menu bar.
3. Select "Settings for This Website..."
4. In the pop-up window, find the "Microphone" option.
5. Click the dropdown menu next to "Microphone" and select "Allow."

**Sound Settings:**

1. Open Safari and navigate to the website for which you want to change the sound settings.
2. Click "Safari" in the top menu bar.
3. Select "Settings for This Website..."
4. In the pop-up window, find the "Auto-Play" option.
5. Click the dropdown menu next to "Auto-Play" and select "Allow All Auto-Play."

**Camera Settings:**

1. Open Safari and navigate to the website for which you want to change the camera settings.
2. Click "Safari" in the top menu bar.
3. Select "Settings for This Website..."
4. In the pop-up window, find the "Camera" option.
5. Click the dropdown menu next to "Camera" and select "Allow."

***

## Mobile/Tablet Browsers <a href="#mobile-tablet-browsers" id="mobile-tablet-browsers"></a>

### Google Chrome (Recommended) <a href="#google-chrome-recommended-1" id="google-chrome-recommended-1"></a>

**Microphone Settings:**

1. Open the web page tab.
2. Tap the three-dot icon in the top right.
3. Select "Settings."
4. Scroll down to find "Site settings."
5. Find and select "Microphone."
6. Turn off the option to allow the sites to "Ask first before allowing sites to use your microphone."

**Sound Settings:**

1. Open the web page tab.
2. Tap the three-dot icon in the top right.
3. Select "Settings."
4. Scroll down to find "Site settings."
5. Find and select "Sound."
6. Turn on the option to "Allow sites to play sound."

**Camera Settings:**

1. Open the web page tab.
2. Tap the three-dot icon in the top right.
3. Select "Settings."
4. Scroll down to find "Site settings."
5. Find and select "Camera."
6. Turn off the option to allow the sites to "Ask first before allowing sites to use your camera."

***

### **Microsoft Edge** <a href="#microsoft-edge-1" id="microsoft-edge-1"></a>

**Microphone Settings:**

1. Tap the three horizontal lines in the bottom right of the screen.
2. Select "Settings."
3. Select "Privacy and security."
4. Select "Site settings."
5. Select "Microphone."
6. Turn off the option to allow the sites to "Ask first before allowing sites to use your microphone."

   **If this does not work, follow these steps:**

   1. Tap "Android settings" under where you have the option to allow sites to ask first (from the previous step 6).
   2. Select "Permissions."
   3. Select "Microphone."
   4. Then select "Allow only while using the app."

**Sound Settings:**

1. Tap the three horizontal lines in the bottom right of the screen.
2. Select "Settings."
3. Select "Privacy and security."
4. Select "Site settings."
5. Scroll down to find and select "Sound."
6. Turn on the option to "Allow sites to play sound."

**Camera Settings:**

1. Tap the three horizontal lines in the bottom right of the screen.
2. Select "Settings."
3. Select "Privacy and security."
4. Select "Site settings."
5. Select "Camera."
6. Turn off the option to allow the sites to "Ask first before allowing sites to use your camera."

   **If this does not work, follow these steps:**

   1. Tap "Android settings" under where you have the option to allow sites to ask first (from the previous step 6).
   2. Select "Permissions."
   3. Select "Camera."
   4. Then select "Allow only while using the app."

***

### **Brave** <a href="#brave-1" id="brave-1"></a>

**Microphone Settings:**

1. Tap the three dots in the bottom right.
2. Scroll down to find and select "Settings."
3. Scroll down to find and select "Site settings."
4. Select "Microphone."
5. Turn off the option "Ask first before allowing sites to use your microphone."

**Sound Settings:**

1. Tap the three dots in the bottom right.
2. Scroll down to find and select "Settings."
3. Scroll down to find and select "Site settings."
4. Scroll down to find and select "Auto-play."
5. Turn off the setting to "Allow sites to play muted videos."

**Camera Settings:**

1. Tap the three dots in the bottom right.
2. Scroll down to find and select "Settings."
3. Scroll down to find and select "Site settings."
4. Select "Camera."
5. Turn off the option "Ask first before allowing sites to use your camera."

***

### **Firefox** <a href="#firefox-1" id="firefox-1"></a>

**Microphone Settings:**

1. Tap the three dots in the top right.
2. Select “Settings.”
3. Scroll down to find and select “Site permissions.”
4. Select “Microphone.”
5. Turn off “Ask to allow.”

**Sound Settings:**

1. Tap the three dots in the top right.
2. Select “Settings.”
3. Scroll down to find and select “Site permissions.”
4. Select “Auto play back.”
5. Turn on “Allow audio and video.”

**Camera Settings:**

1. Tap the three dots in the top right.
2. Select “Settings.”
3. Scroll down to find and select “Site permissions.”
4. Select “Camera.”
5. Turn off “Ask to allow.”

   **If this does not work, follow these steps:**

   1. Tap "Go to settings" under where you have the option to allow sites to ask first (from the previous step 6).
   2. Select "Permissions."
   3. Select "Camera."
   4. Then select "Allow only while using the app."

***

### **Opera** <a href="#opera-1" id="opera-1"></a>

**Microphone Settings:**

1. In the bottom right, tap the profile icon.
2. Tap the settings cog icon on the top right of the pop-up.
3. Find and select “Privacy and security.”
4. Select “Site permissions.”
5. Select “Microphone.”
6. Turn off “Ask every time” setting.

**Sound Settings:**

1. In the bottom right, tap the profile icon.
2. Tap the settings cog icon on the top right of the pop-up.
3. Find and select “Privacy and security.”
4. Select “Site permissions.”
5. Select “Sound.”
6. Turn off “Ask every time” setting.

**Camera Settings:**

1. In the bottom right, tap the profile icon.
2. Tap the settings cog icon on the top right of the pop-up.
3. Find and select “Privacy and security.”
4. Select “Site permissions.”
5. Select “Camera.”
6. Turn off “Ask every time” setting.

***

### **Safari** <a href="#safari-1" id="safari-1"></a>

**Microphone Settings:**

1. Open Safari and navigate to the website for which you want to change the microphone settings.
2. Tap the "aA" icon in the address bar.
3. Select "Website Settings."
4. In the pop-up window, find the "Microphone" option.
5. Tap on the "Microphone" option and select "Allow."

**Sound Settings:**

1. Open Safari and navigate to the website for which you want to change the sound settings.
2. Tap the "aA" icon in the address bar.
3. Select "Website Settings."
4. In the pop-up window, find the "Auto-Play" option.
5. Tap on the "Auto-Play" option and select "Allow All Auto-Play."

**Camera Settings:**

1. Open Safari and navigate to the website for which you want to change the camera settings.
2. Tap the "aA" icon in the address bar.
3. Select "Website Settings."
4. In the pop-up window, find the "Camera" option.
5. Tap on the "Camera" option and select "Allow."


# Preferred System Settings

Optimize your experience by configuring your system settings for GPU high performance and enabling hardware acceleration in your browser.

## **GPU High Performance on System** <a href="#gpu-high-performance-on-system" id="gpu-high-performance-on-system"></a>

1. Open the Start menu and select "Settings."
2. Click on "System."
3. Select "Display" from the left-hand menu.
4. Scroll down and click on "Graphics settings."
5. Under "Choose an app to set preference," select "Desktop app" or "Microsoft Store app" from the dropdown menu.
6. Click "Browse" and navigate to the browser you use for Orbit, i.e. Google Chrome.
7. Once added, click on the app, then select "Options."
8. Choose "High performance" and click "Save."

***

## **Graphic Acceleration** <a href="#graphic-acceleration" id="graphic-acceleration"></a>

### **Google Chrome** <a href="#google-chrome" id="google-chrome"></a>

1. Open Chrome and click on the three-dot menu icon in the top right corner.
2. Select "Settings."
3. Under the "System" section, toggle on "Use hardware acceleration when available."
4. Restart Chrome to apply the changes.

### **Microsoft Edge** <a href="#microsoft-edge" id="microsoft-edge"></a>

1. Open Edge and click on the three-dot menu icon in the top-right corner.
2. Select "Settings."
3. Scroll down and click on "System and performance."
4. Toggle on "Use hardware acceleration when available."
5. Restart Edge to apply the changes.

### **Brave** <a href="#brave" id="brave"></a>

1. Open Brave and click on the three-line menu icon in the top-right corner.
2. Select "Settings."
3. Under the "System" section, toggle on "Use hardware acceleration when available."
4. Restart Brave to apply the changes.

### **Firefox** <a href="#firefox" id="firefox"></a>

1. Open Firefox and click on the three-line menu icon in the top-right corner.
2. Select "Settings."
3. Scroll down to the "Performance" section.
4. Uncheck "Use recommended performance settings."
5. Check "Use hardware acceleration when available."
6. Restart Firefox to apply the changes.

### **Opera** <a href="#opera" id="opera"></a>

1. Open Opera and click on the three-dot menu icon in the bottom-left corner.
2. Select "Settings."
3. Scroll down and click on "System" to expand more options.
4. Toggle on "Use graphics acceleration when available."
5. Restart Opera to apply the changes.

### **Opera GX** <a href="#opera-gx" id="opera-gx"></a>

1. Open Opera GX and click on the three-dot menu icon in the bottom-left corner.
2. Select "Settings."
3. Scroll down and click on "System" to expand more options.
4. Toggle on "Use graphics acceleration when available."
5. Restart Opera GX to apply the changes.

***

## **Enabling WebGL** <a href="#enabling-webgl" id="enabling-webgl"></a>

The latest versions of most modern browsers have WebGL enabled by default and do not show WebGL options in the flags settings. However, if you encounter issues or need to verify its activation, here's how you can ensure WebGL is active or adjust related settings in your browser:

**Note:** Ensure Graphic Acceleration is enabled first [Graphic Acceleration](https://help.orbitmultiverse.xyz/miscellaneous/preferred-system-settings#graphic-acceleration).

### **Google Chrome** <a href="#google-chrome-1" id="google-chrome-1"></a>

1. Type `chrome://flags` in the address bar and press Enter.
2. Search for "WebGL" and ensure that "WebGL Draft Extensions" and "WebGL 2.0" are enabled.
3. Restart Chrome to apply the changes.

### **Microsoft Edge** <a href="#microsoft-edge-1" id="microsoft-edge-1"></a>

1. Type `edge://flags` in the address bar and press Enter.
2. Search for "WebGL" and ensure that "WebGL Draft Extensions" and "WebGL 2.0" are enabled.
3. Restart Edge to apply the changes.

### **Brave** <a href="#brave-1" id="brave-1"></a>

1. Type `brave://flags` in the address bar and press Enter.
2. Search for "WebGL" and ensure that "WebGL Draft Extensions" and "WebGL 2.0" are enabled.
3. Restart Brave to apply the changes.

### **Firefox** <a href="#firefox-1" id="firefox-1"></a>

1. Open Firefox and type `about:config` in the address bar, then press Enter.
2. Accept the risk and continue to the configuration page.
3. Search for `webgl.force-enabled` and set it to `true`.
4. Search for `webgl.msaa-force` and set it to `true`.
5. Restart Firefox to apply the changes.

### **Opera** <a href="#opera-1" id="opera-1"></a>

1. Type `opera://flags` in the address bar and press Enter.
2. Search for "WebGL" and ensure that "WebGL Draft Extensions" and "WebGL 2.0" are enabled.
3. Restart Opera to apply the changes.

### **Opera GX** <a href="#opera-gx-1" id="opera-gx-1"></a>

1. Type `opera://flags` in the address bar and press Enter.
2. Search for "WebGL" and ensure that "WebGL Draft Extensions" and "WebGL 2.0" are enabled.
3. Restart Opera GX to apply the changes.

***

## **Note for Mobile Users** <a href="#note-for-mobile-users" id="note-for-mobile-users"></a>

* Mobile browsers typically optimize performance settings automatically.
* Ensure your mobile device is updated to the latest version of its operating system for optimal performance.
* For better performance, close other background apps while using Orbit.

## Benefits of using Preferred System Settings <a href="#benefits-of-using-preferred-system-settings" id="benefits-of-using-preferred-system-settings"></a>

* **Improved Performance:** Enabling hardware acceleration allows your browser to use your GPU for rendering, improving performance and responsiveness in Orbit.
* **Enhanced Graphics:** GPU high performance settings ensure that graphics-intensive applications like Orbit run smoothly and efficiently.
* **Optimized Resources:** Offloading tasks to the GPU frees up CPU resources, resulting in a more balanced system performance.
* **Seamless Experience:** Enjoy a more fluid and responsive virtual experience in Orbit by optimizing your system settings.


# Public Communication Issues

Resolve common issues with Public Audio and Communication in Orbit to ensure seamless and effective communication within the virtual environment.

## **No Sound from Public Users** <a href="#no-sound-from-public-users" id="no-sound-from-public-users"></a>

* **Check Volume Settings:** Ensure the volume slider for Public Voice Chat is turned up.
* **Verify Microphone Status:** Make sure the microphone icon for each of the public users is not muted (red microphone icon).
* **Adjust Device Volume:** Check the volume settings on your device to ensure they are not muted or set too low.

## **Microphone Not Working** <a href="#microphone-not-working" id="microphone-not-working"></a>

* **Allow Microphone Access:** Ensure that the app has permission to access your microphone in your device settings. Use this guide to check and set [Browser Permissions](https://help.orbitmultiverse.xyz/miscellaneous/browser-permissions).
* **Select Correct Microphone:** Go to the Public Voice Chat settings and make sure the correct microphone is selected. Here is a guide to change the microphone - [Communication settings](https://help.orbitmultiverse.xyz/settings/communication-settings).
* **Test Microphone:** Use your device’s audio settings to test the microphone and ensure it is functioning properly.

## **Bad Audio Quality** <a href="#bad-audio-quality" id="bad-audio-quality"></a>

* **Check Your Connection:** Ensure you have a stable internet connection. Poor connectivity can cause audio issues.
* **Update Drivers:** Make sure your audio drivers are up to date. Outdated drivers can cause compatibility issues and degrade audio quality.
* **Restart the Application:** Sometimes, restarting the application can resolve temporary glitches affecting audio quality.
* **Check for Interference:** Ensure there are no other applications or devices interfering with your audio. Close any unnecessary applications that might be using audio resources.
* **Test Your Microphone and Speakers:** Use the built-in testing features of your device's audio settings to ensure your microphone and speakers are functioning correctly.
* **Bluetooth Issues:** Bluetooth headsets can sometimes cause audio quality problems, especially when the microphone is in use. Try switching to a wired connection or using an external microphone instead of the built-in mic on your Bluetooth headset.
* **Power Management:** Ensure your device is not in low-power mode, as this can impact audio performance. Plug in your device or disable power-saving settings when using audio features extensively.

## **Echo or Feedback Issues** <a href="#echo-or-feedback-issues" id="echo-or-feedback-issues"></a>

* **Use Headphones:** Wearing headphones can help reduce echo and feedback.
* **Adjust Microphone Sensitivity:** Lower the sensitivity of your microphone in the Public Voice Chat settings.
* **Check Speaker Placement:** Ensure your speakers and microphone are not too close to each other.

## **Intermittent Sound Issues** <a href="#intermittent-sound-issues" id="intermittent-sound-issues"></a>

* **Check Internet Connection:** Ensure you have a stable internet connection. Unstable connections can cause sound issues.
* **Close Unnecessary Applications:** Close other applications that might be using significant bandwidth or system resources.

## **Cannot Hear Public Sounds** <a href="#cannot-hear-public-sounds" id="cannot-hear-public-sounds"></a>

* **Check Mute Settings:** Ensure that the “mute public players” toggle is not enabled if you want to hear public sounds in the virtual space.
* **Adjust Audio Balance:** Check the audio balance settings on your device to ensure it is not favoring one type of sound over another.

## **Microphone Cuts Out** <a href="#microphone-cuts-out" id="microphone-cuts-out"></a>

* **Stable Connection:** Ensure your internet connection is stable to prevent interruptions in voice chat.
* **Update Drivers:** Make sure your audio drivers are up to date on your device.
* **Reduce Background Noise:** Move to a quieter location or use noise-canceling microphones to reduce interference.

## **Audio Not Playing Through Speakerphone on Mobile Devices** <a href="#audio-not-playing-through-speakerphone-on-mobile-devices" id="audio-not-playing-through-speakerphone-on-mobile-devices"></a>

* **Check Silent Mode:** Ensure that your device is not in silent mode.
* **Use Headset or Earbuds:** For the best quality audio, use a headset, earbuds, or headphones.

## **Messages Not Sending:** <a href="#messages-not-sending" id="messages-not-sending"></a>

* **Check Internet Connection:** Ensure you have a stable internet connection.
* **Refresh Chat Window:** Try refreshing the chat window or reopening the Party Chat.

## **Cannot See Messages:** <a href="#cannot-see-messages" id="cannot-see-messages"></a>

* **Check Hidden Messages:** Ensure that you have not hidden messages from specific users by pressing the text chat icon next to their names.
* **Scroll Through Chat:** Scroll up or down to check for missed messages.
* **Adjust Window Size:** Ensure the chat window is maximized or expanded to view all messages.

## **Delayed Messages:** <a href="#delayed-messages" id="delayed-messages"></a>

* **Stable Connection:** Ensure your internet connection is stable to prevent delays.
* **Close Unnecessary Applications:** Close other applications that might be using significant bandwidth or system resources.

## **Spam or Offensive Messages:** <a href="#spam-or-offensive-messages" id="spam-or-offensive-messages"></a>

* **Hide Messages:** Press the text chat icon next to the offending user’s name to hide their messages.


# Private Communication Issues

Resolve common issues with Private Communication using this troubleshooting guide to ensure seamless and uninterrupted communication.

## Voice Chat <a href="#voice-chat" id="voice-chat"></a>

### **No Sound from Party Members** <a href="#no-sound-from-party-members" id="no-sound-from-party-members"></a>

* **Check Volume Settings:** Ensure the volume slider for Party Chat is turned up.
* **Verify Microphone Status:** Make sure the microphone icon for each of the members is not muted (red microphone icon).
* **Adjust Device Volume:** Check the volume settings on your device to ensure they are not muted or set too low.

### **Microphone Not Working** <a href="#microphone-not-working" id="microphone-not-working"></a>

* **Allow Microphone Access:** Ensure that the app has permission to access your microphone in your device settings - use this guide to check and set browser permissions [Browser Permissions](https://help.orbitmultiverse.xyz/miscellaneous/browser-permissions).
* **Select Correct Microphone:** Go to the [Communication settings](https://help.orbitmultiverse.xyz/settings/communication-settings) and make sure the correct microphone is selected.
* **Test Microphone:** Use your device’s audio settings to test the microphone and ensure it is functioning properly.

### Bad Audio Quality <a href="#bad-audio-quality" id="bad-audio-quality"></a>

* **Check Your Connection:** Ensure you have a stable internet connection. Poor connectivity can cause audio issues.
* **Update Drivers:** Make sure your audio drivers are up to date. Outdated drivers can cause compatibility issues and degrade audio quality.
* **Restart the Application:** Sometimes, restarting the application can resolve temporary glitches affecting audio quality.
* **Check for Interference:** Ensure there are no other applications or devices interfering with your audio. Close any unnecessary applications that might be using audio resources.
* **Test Your Microphone and Speakers:** Use the built-in testing features of your device's audio settings to ensure your microphone and speakers are functioning correctly.
* **Bluetooth Issues:** Bluetooth headsets can sometimes cause audio quality problems, especially when the microphone is in use. Try switching to a wired connection or using an external microphone instead of the built-in mic on your Bluetooth headset.
* **Power Management:** Ensure your device is not in low-power mode, as this can impact audio performance. Plug in your device or disable power-saving settings when using audio features extensively.

### **Echo or Feedback Issues** <a href="#echo-or-feedback-issues" id="echo-or-feedback-issues"></a>

* **Use Headphones:** Wearing headphones can help reduce echo and feedback.
* **Adjust Microphone Sensitivity:** Lower the sensitivity of your microphone in the Party Chat settings.
* **Check Speaker Placement:** Ensure your speakers and microphone are not too close to each other.

### **Intermittent Sound Issues** <a href="#intermittent-sound-issues" id="intermittent-sound-issues"></a>

* **Check Internet Connection:** Ensure you have a stable internet connection. Unstable connections can cause sound issues.
* **Close Unnecessary Applications:** Close other applications that might be using significant bandwidth or system resources.

### **Cannot Hear Public Sounds** <a href="#cannot-hear-public-sounds" id="cannot-hear-public-sounds"></a>

* **Check Mute Settings:** Ensure that the “mute public players” toggle is not enabled if you want to hear public sounds in the virtual space.
* **Adjust Audio Balance:** Check the audio balance settings on your device to ensure it is not favoring one type of sound over another.

### **Microphone Cuts Out** <a href="#microphone-cuts-out" id="microphone-cuts-out"></a>

* **Stable Connection:** Ensure your internet connection is stable to prevent interruptions in voice chat.
* **Update Drivers:** Make sure your audio drivers are up to date on your device.
* **Reduce Background Noise:** Move to a quieter location or use noise-canceling microphones to reduce interference.

### **Audio Not Playing Through Speakerphone on Mobile Devices** <a href="#audio-not-playing-through-speakerphone-on-mobile-devices" id="audio-not-playing-through-speakerphone-on-mobile-devices"></a>

* **Check Silent Mode:** Ensure that your device is not in silent mode.
* **Use Headset or Earbuds:** For the best quality audio, use a headset, earbuds, or headphones.

***

## Video Chat <a href="#video-chat" id="video-chat"></a>

### **No Camera from Party Members** <a href="#no-camera-from-party-members" id="no-camera-from-party-members"></a>

* **Verify Camera Status:** Make sure the camera icon for each of the members is not disabled (red camera icon).
* **Check Device Camera:** Ensure your device’s camera is functioning properly and is not blocked or covered.

### **Camera Not Working** <a href="#camera-not-working" id="camera-not-working"></a>

* **Allow Camera Access:** Ensure that the app has permission to access your camera in your device settings - use this guide to check and set browser permissions [Browser Permissions](https://help.orbitmultiverse.xyz/miscellaneous/browser-permissions).
* **Select Correct Camera:** Go to the Party Chat settings and make sure the correct camera is selected.
* **Test Camera:** Use your device’s camera settings to test the camera and ensure it is functioning properly.

### **Poor Video Quality** <a href="#poor-video-quality" id="poor-video-quality"></a>

* **Check Internet Connection:** Ensure you have a stable and fast internet connection. Unstable connections can cause poor video quality.
* **Close Unnecessary Applications:** Close other applications that might be using significant bandwidth or system resources.

### **Lagging or Freezing Video** <a href="#lagging-or-freezing-video" id="lagging-or-freezing-video"></a>

* **Stable Connection:** Ensure your internet connection is stable to prevent lagging or freezing.
* **Update the App:** Ensure you are using the latest version of the Orbit app.
* **Optimize Device Performance:** Close background applications and clear unnecessary files to optimize your device’s performance.

### **Video Cuts Out** <a href="#video-cuts-out" id="video-cuts-out"></a>

* **Stable Connection:** Ensure your internet connection is stable to prevent interruptions in video chat.
* **Update Drivers:** Make sure your video drivers are up to date on your device.
* **Check for Interference:** Ensure there are no other applications or devices interfering with your video chat.

***

## Text Chat <a href="#text-chat" id="text-chat"></a>

### **Messages Not Sending** <a href="#messages-not-sending" id="messages-not-sending"></a>

* **Check Internet Connection:** Ensure you have a stable internet connection.
* **Refresh Chat Window:** Try refreshing the chat window or reopening the Party Chat.

### **Cannot See Messages** <a href="#cannot-see-messages" id="cannot-see-messages"></a>

* **Check Hidden Messages:** Ensure that you have not hidden messages from specific users by pressing the text chat icon next to their names.
* **Scroll Through Chat:** Scroll up or down to check for missed messages.
* **Adjust Window Size:** Ensure the chat window is maximized or expanded to view all messages.

### **Delayed Messages** <a href="#delayed-messages" id="delayed-messages"></a>

* **Stable Connection:** Ensure your internet connection is stable to prevent delays.
* **Close Unnecessary Applications:** Close other applications that might be using significant bandwidth or system resources.

### **Spam or Offensive Messages** <a href="#spam-or-offensive-messages" id="spam-or-offensive-messages"></a>

* **Hide Messages:** Press the text chat icon next to the offending user’s name to hide their messages.

***

## Screen Sharing <a href="#screen-sharing" id="screen-sharing"></a>

### **Screen Share Not Working** <a href="#screen-share-not-working" id="screen-share-not-working"></a>

* **Allow Screen Share Access:** Ensure that the app has permission to share your screen in your device settings - use this guide to check and set browser permissions [Browser Permissions](https://help.orbitmultiverse.xyz/miscellaneous/browser-permissions).
* **Select Correct Screen:** Ensure you are selecting the correct screen or application window to share.
* **Check Device Settings:** Ensure your device settings allow screen sharing.

### **Poor Screen Share Quality** <a href="#poor-screen-share-quality" id="poor-screen-share-quality"></a>

* **Check Internet Connection:** Ensure you have a stable and fast internet connection. Unstable connections can cause poor screen share quality.
* **Close Unnecessary Applications:** Close other applications that might be using significant bandwidth or system resources.
* **Adjust Screen Resolution:** Lower the screen resolution to improve performance.

### **Lagging or Freezing Screen Share** <a href="#lagging-or-freezing-screen-share" id="lagging-or-freezing-screen-share"></a>

* **Stable Connection:** Ensure your internet connection is stable to prevent lagging or freezing.
* **Update the App:** Ensure you are using the latest version of the Orbit app.
* **Optimize Device Performance:** Close background applications and clear unnecessary files to optimize your device’s performance.

### **Cannot See Shared Screen** <a href="#cannot-see-shared-screen" id="cannot-see-shared-screen"></a>

* **Check Hidden Screen Share:** Ensure that you have not hidden the screen share from specific users by pressing the screen-share icon next to their names.
* **Refresh Chat Window:** Try refreshing the chat window or reopening the Party Chat.
* **Adjust Window Size:** Ensure the chat window is maximized or expanded to view the shared screen.


# General FAQ

General Questions about Metacom Space


# Getting set up

<details>

<summary>Step1: Creating your organization</summary>

</details>

<details>

<summary>Step 2: Inviting your team</summary>

</details>

<details>

<summary>Step 3: Making your first post</summary>

</details>


# Setting permissions

## Permission levels

There are 4 types of permission levels for leased spaces.

<table><thead><tr><th width="236">Role</th><th>Capabilities</th></tr></thead><tbody><tr><td>Administrator</td><td>All Access</td></tr><tr><td>Tenant</td><td>Manage Leased Space</td></tr><tr><td>Sponsor</td><td>Exclusive Access</td></tr><tr><td>Guest</td><td>Limited Access</td></tr></tbody></table>


# Inviting Members


# Pricing

Information on pricing for Private Spaces

**Lease Fees** - For private spaces, we charge recurring monthly fees. These fees will be determined based on factors such as the size, quality, and type of space, maximum capacity, and any unique features it offers.

**Add-On Fees** - In addition to base lease or rental fees, we'll offer digital items that you can purchase in our marketplace to customize and enhance your spaces.

**Detailed Listings:** Our virtual spaces will be listed similar to real estate properties, providing detailed information about each space, including price, images, type, size, capacity, and features.

Our pricing strategy offers several advantages over a subscription plan pricing strategy:

* Flexibility for Tenants: With the lease and rental fee model, users have the flexibility to choose the pricing structure that best suits their needs. Some users may prefer the stability of a monthly lease for private spaces, while others may opt for hourly or daily rentals for public spaces. This flexibility accommodates different usage patterns and budgets, making it more attractive to a wider range of users.
* Fair Pricing: Subscription plans often charge a flat fee regardless of usage, which can be disadvantageous for users who only need occasional access to virtual spaces. By charging based on usage (either through lease or rental fees), users pay only for what they use, ensuring fair pricing that aligns with the value they receive.
* Scalability: The lease and rental fee model allows for scalability as users can easily adjust their usage based on their evolving needs. They can upgrade to larger spaces or extend rental durations as their events grow, without being locked into a fixed subscription plan. This scalability fosters long-term customer satisfaction and retention.
* Market Adaptability: A flexible pricing strategy allows Metacom Space to change prices on demand and adapt to market dynamics and customer feedback more easily compared to rigid subscription plans, ensuring continued relevance and competitiveness in the market.


# Communication


# Chatting With Your Team


# Broadcasting to Tenants


# Events


# Analytics


# FAQ

Questions about tenants for Private Spaces

How many exhibitor booths are available for each venue?


# Getting set up

<details>

<summary>Step1: Creating your organization</summary>

</details>

<details>

<summary>Step 2: Inviting your team</summary>

</details>

<details>

<summary>Step 3: Making your first post</summary>

</details>

<details>

<summary>ASDFASDF</summary>

ASDFASDF

</details>


# Setting permissions

{% hint style="info" %}
**GitBook tip:** your product docs aren't just a reference of all your features, use them to encourage folks to perform certain actions and discover the value in your product.
{% endhint %}

## Permission levels

There are 4 types of permission levels in the product.

<table><thead><tr><th width="236">Role</th><th>Capabilities</th></tr></thead><tbody><tr><td>Administrator</td><td>Has all admin privileges</td></tr><tr><td>Editor</td><td>Can edit posts</td></tr><tr><td>Viewer</td><td>Can only view posts</td></tr><tr><td>Guest</td><td>Can only view posts they are inivted to</td></tr></tbody></table>


# Inviting Members

{% hint style="info" %}
**GitBook tip:** Try out a range of different content types to keep folks engaged and interested in each feature, some content types work for different chunks of information
{% endhint %}

<details>

<summary>As a Guest User</summary>

</details>

<details>

<summary>As an Editor</summary>

</details>

<details>

<summary>As an Admin</summary>

</details>


# Pricing

Information on pricing for Public Spaces

**Rental Fees** - Public spaces will be available for hourly or daily rentals. The rental fees will be calculated based on factors like the size, quality, and type of space, maximum capacity, duration of rental, and any additional features. This flexible model allows you to pay only for the time you need for short-term events or gatherings.

**Add-On Fees** - In addition to base lease or rental fees, we'll offer digital items that you can purchase in our marketplace to customize and enhance your spaces.

**Detailed Listings:** Our virtual spaces will be listed similar to real estate properties, providing detailed information about each space, including price, images, type, size, capacity, and features.

Our pricing strategy offers several advantages over a subscription plan pricing strategy:

* Flexibility for Renters: With the lease and rental fee model, users have the flexibility to choose the pricing structure that best suits their needs. Some users may prefer the stability of a monthly lease for private spaces, while others may opt for hourly or daily rentals for public spaces. This flexibility accommodates different usage patterns and budgets, making it more attractive to a wider range of users.
* Fair Pricing: Subscription plans often charge a flat fee regardless of usage, which can be disadvantageous for users who only need occasional access to virtual spaces. By charging based on usage (either through lease or rental fees), users pay only for what they use, ensuring fair pricing that aligns with the value they receive.
* Scalability: The lease and rental fee model allows for scalability as users can easily adjust their usage based on their evolving needs. They can upgrade to larger spaces or extend rental durations as their events grow, without being locked into a fixed subscription plan. This scalability fosters long-term customer satisfaction and retention.
* Market Adaptability: A flexible pricing strategy allows Metacom Space to change prices on demand and adapt to market dynamics and customer feedback more easily compared to rigid subscription plans, ensuring continued relevance and competitiveness in the market.


# Communication


# Chatting With Team Members


# Chatting With Hosts


# Chatting With Exhibitors


# Broadcasting to Attendees


# Events


# Creating an Event


# Getting Exhibitors


# Getting Sponsors


# Selling Tickets


# Analytics


# FAQ

Questions about Renters/Hosts for Public Spaces

How many exhibitor booths are available for each venue?


# Getting set up

<details>

<summary>Step1: Creating your profile</summary>

</details>


# Controls and Settings


# FAQ

Questions about Visitors/Attendees


# Number of Attendees?


# How to be a Sponsor

## Step By Step Tutorial to Successfully Sponsoring an Event

Using the dropdown menu to show steps 1-7 to create, submit, and attend an event.

1. [Creating your account](/exhibitors/how-to-be-an-exhibitor/1.-create-account)
2. [Approval](/exhibitors/how-to-be-an-exhibitor/7.-approval)

Have any questions that need Immediate Answer <https://discord.gg/metacomspace>.

Join and create a ticket regarding your inquiry!

<figure><img src="https://2077032912-files.gitbook.io/~/files/v0/b/gitbook-x-prod.appspot.com/o/spaces%2FeeCKjsN28y6WnfmlSN8M%2Fuploads%2FVURpMysnKulpS9xXeURK%2FNew%20booth.PNG?alt=media&amp;token=ccdccfa9-9dcf-417c-be4f-34a5e4cd6657" alt=""><figcaption></figcaption></figure>


# 1. Create Account

Creating An Account allows access to our very own unique dashboard.&#x20;

Start creating an account by going to [Logging Into the Dashboard](/exhibitors/how-to-be-an-exhibitor/1.-create-account/log-into-the-dashboard)

<figure><img src="https://2077032912-files.gitbook.io/~/files/v0/b/gitbook-x-prod.appspot.com/o/spaces%2FeeCKjsN28y6WnfmlSN8M%2Fuploads%2Fk4z67UMdq1KuSSa3kfPb%2Fimage.png?alt=media&amp;token=ccf26429-7194-4806-a009-942be4bf6076" alt=""><figcaption><p>Can't Wait to Have you!</p></figcaption></figure>


# Logging Into the Dashboard

The Menu you will be met with will give you an option to creating your account through different methods!

Select one of the options Discord, Google, Linkin, Twitter, Twitch, Or Entering your email address to create your account.

Be sure to use the same email or method of logging in to access your account!

<figure><img src="https://2077032912-files.gitbook.io/~/files/v0/b/gitbook-x-prod.appspot.com/o/spaces%2FeeCKjsN28y6WnfmlSN8M%2Fuploads%2FniXW54Uz8yAxo5vVIOAf%2FLogin.PNG?alt=media&amp;token=3771d182-4df1-4dfe-b2b9-a6966843afb4" alt=""><figcaption></figcaption></figure>


# Organization

This will be the Dashboard you will be met with.

It is important to familiarize yourself with the dashboard, for every event you want to attend you will need to know where to go!

<figure><img src="https://2077032912-files.gitbook.io/~/files/v0/b/gitbook-x-prod.appspot.com/o/spaces%2FeeCKjsN28y6WnfmlSN8M%2Fuploads%2FXQTHLfFAfgUzVkpelMuk%2FDashboard.PNG?alt=media&amp;token=0dfe7de9-e3c6-4e30-bd3c-3b0c93d27587" alt=""><figcaption></figcaption></figure>

The second step will be to rename your Organization in the "Organization" Section of the left side menu highlighted in purple!

Your Organization is your team name and it can be changed in the text box highlighted in purple.

Any Change should be saved or will not be saved when refreshing or deleting the tab, the save button is below the text box highlighted in purple as well!

<figure><img src="https://2077032912-files.gitbook.io/~/files/v0/b/gitbook-x-prod.appspot.com/o/spaces%2FeeCKjsN28y6WnfmlSN8M%2Fuploads%2FGOikidM9wWmqN2vY58cH%2Fimage_2022-10-24_154226971.png?alt=media&amp;token=c971548c-06a4-4b02-b357-3f171e8e58ed" alt=""><figcaption></figcaption></figure>


# 2. Submit Application

Choose type of sponsorship

* Public Exposure
* Promotional Items


# 3. Get Approval


# Submitting Content


# Giveaways


# Pricing

## Pricing Will be Dependent on the host

Hosts are people who organize the events and bring exhibitors into their event. The price will depend on what the host decides in the event.


# Sponsor Analytics


# FAQ

Questions about Sponsors


# How to be an Exhibitor

## Step By Step Tutorial to Successfully Exhibit at an Event

Using the dropdown menu to show steps 1-7 to create, submit, and attend an event.

1. [Creating your account](/exhibitors/how-to-be-an-exhibitor/1.-create-account)
2. [Creating Booths](/exhibitors/how-to-be-an-exhibitor/2.-create-booth)
3. [Booth Settings](/exhibitors/how-to-be-an-exhibitor/3.-booth-settings)
4. [Assigning Teams](/exhibitors/how-to-be-an-exhibitor/4.-assigning-team)
5. [Customizing Booth](/exhibitors/how-to-be-an-exhibitor/5.-customizing-booth)
6. [Verify Credentials](/exhibitors/how-to-be-an-exhibitor/6.-verify-credentials)
7. [Approval](/exhibitors/how-to-be-an-exhibitor/7.-approval)

Have any questions that need Immediate Answer <https://discord.gg/metacomspace>.

Join and create a ticket regarding your inquiry!

<figure><img src="https://2077032912-files.gitbook.io/~/files/v0/b/gitbook-x-prod.appspot.com/o/spaces%2FeeCKjsN28y6WnfmlSN8M%2Fuploads%2FVURpMysnKulpS9xXeURK%2FNew%20booth.PNG?alt=media&amp;token=ccdccfa9-9dcf-417c-be4f-34a5e4cd6657" alt=""><figcaption></figcaption></figure>


# 1. Create Account

Creating An Account allows access to our very own unique dashboard.&#x20;

Start creating an account by going to [Logging Into the Dashboard](/exhibitors/how-to-be-an-exhibitor/1.-create-account/log-into-the-dashboard)

<figure><img src="https://2077032912-files.gitbook.io/~/files/v0/b/gitbook-x-prod.appspot.com/o/spaces%2FeeCKjsN28y6WnfmlSN8M%2Fuploads%2Fk4z67UMdq1KuSSa3kfPb%2Fimage.png?alt=media&amp;token=ccf26429-7194-4806-a009-942be4bf6076" alt=""><figcaption><p>Can't Wait to Have you!</p></figcaption></figure>


# Log into the Dashboard

The Menu you will be met with will give you an option to creating your account through different methods!

Select one of the options Discord, Google, Linkin, Twitter, Twitch, Or Entering your email address to create your account.

Be sure to use the same email or method of logging in to access your account!

<figure><img src="https://2077032912-files.gitbook.io/~/files/v0/b/gitbook-x-prod.appspot.com/o/spaces%2FeeCKjsN28y6WnfmlSN8M%2Fuploads%2FniXW54Uz8yAxo5vVIOAf%2FLogin.PNG?alt=media&amp;token=3771d182-4df1-4dfe-b2b9-a6966843afb4" alt=""><figcaption></figcaption></figure>


# Organization

This will be the Dashboard you will be met with.

It is important to familiarize yourself with the dashboard, for every event you want to attend you will need to know where to go!

<figure><img src="https://2077032912-files.gitbook.io/~/files/v0/b/gitbook-x-prod.appspot.com/o/spaces%2FeeCKjsN28y6WnfmlSN8M%2Fuploads%2FXQTHLfFAfgUzVkpelMuk%2FDashboard.PNG?alt=media&amp;token=0dfe7de9-e3c6-4e30-bd3c-3b0c93d27587" alt=""><figcaption></figcaption></figure>

The second step will be to rename your Organization in the "Organization" Section of the left side menu highlighted in purple!

Your Organization is your team name and it can be changed in the text box highlighted in purple.

Any Change should be saved or will not be saved when refreshing or deleting the tab, the save button is below the text box highlighted in purple as well!

<figure><img src="https://2077032912-files.gitbook.io/~/files/v0/b/gitbook-x-prod.appspot.com/o/spaces%2FeeCKjsN28y6WnfmlSN8M%2Fuploads%2FGOikidM9wWmqN2vY58cH%2Fimage_2022-10-24_154226971.png?alt=media&amp;token=c971548c-06a4-4b02-b357-3f171e8e58ed" alt=""><figcaption></figcaption></figure>


# 2. Create Booth

## Your Organization's Booth

&#x20;This step (2) we will [create a booth](/exhibitors/how-to-be-an-exhibitor/2.-create-booth/design-the-booth), Your booth will be seen by your organization.

Give it a good name,but it can always be changed in [Naming your Booth And Choosing](broken://pages/EugVNtUAOVRji3wsuUES).

(expo)


# Design the Booth

As you can see in the image displayed below there is an option to creating your booth.&#x20;

How do you find this option, In the left side menu you can see there is "Exhibitors Booths" In highlighted purple that is where you will find this option to create a booth.

<figure><img src="https://2077032912-files.gitbook.io/~/files/v0/b/gitbook-x-prod.appspot.com/o/spaces%2FeeCKjsN28y6WnfmlSN8M%2Fuploads%2FukLISL2PMPicHB0RceXn%2FCreating%20booth.PNG?alt=media&amp;token=cf3f3b42-744d-4ea8-8cb5-d6817c86f270" alt=""><figcaption></figcaption></figure>


# 3. Booth Settings

To Find your way into the booth settings you will need to have a booth, which we went over in the previous [step 2](/exhibitors/how-to-be-an-exhibitor/2.-create-booth)

Your booth settings will be inside your Booth mine being Space Pirates, so I will click on it and it will show my very own booth.

<figure><img src="https://2077032912-files.gitbook.io/~/files/v0/b/gitbook-x-prod.appspot.com/o/spaces%2FeeCKjsN28y6WnfmlSN8M%2Fuploads%2FAUoq8mMkjFSu8gjAktgX%2Fimage_2022-10-26_122846362.png?alt=media&amp;token=4e428eb5-ef96-4887-82f7-2016b6280571" alt=""><figcaption></figcaption></figure>

After Clicking into your booth there will be a different left hand menu

&#x20;By selecting the option in purple it will take you to your booth's settings

In this spot there will be options of seeing and changing: [Booth Profile](/exhibitors/how-to-be-an-exhibitor/3.-booth-settings/booth-profile), [Social Links](/exhibitors/how-to-be-an-exhibitor/3.-booth-settings/social-links), [Images](/exhibitors/how-to-be-an-exhibitor/3.-booth-settings/images), [Videos](/exhibitors/how-to-be-an-exhibitor/3.-booth-settings/videos), [Features](/exhibitors/how-to-be-an-exhibitor/3.-booth-settings/features), [Analytics](/exhibitors/how-to-be-an-exhibitor/3.-booth-settings/analytics), [General](/exhibitors/how-to-be-an-exhibitor/3.-booth-settings/general), [Billing](/exhibitors/how-to-be-an-exhibitor/3.-booth-settings/billing)

<figure><img src="https://2077032912-files.gitbook.io/~/files/v0/b/gitbook-x-prod.appspot.com/o/spaces%2FeeCKjsN28y6WnfmlSN8M%2Fuploads%2Fh3E5XhJeSR70MU19rD2v%2Fimage_2022-10-26_123154173.png?alt=media&amp;token=ecfd24a5-fbb5-43bb-b533-657e155aae56" alt=""><figcaption></figcaption></figure>


# Booth Profile

Booth Profile Is where you will be able to change the booth name, description, logo, and the tags. This additional information is used when in there is an event happening in the expo hall (Metaconference) and people would like to know more about your Project/Booth.

<figure><img src="https://2077032912-files.gitbook.io/~/files/v0/b/gitbook-x-prod.appspot.com/o/spaces%2FeeCKjsN28y6WnfmlSN8M%2Fuploads%2FeaHih6zHdiD9HOuLibu9%2Fimage_2022-10-26_123553687.png?alt=media&amp;token=8f7f24a3-bd5c-4161-85ff-53a0a5ab4495" alt=""><figcaption></figcaption></figure>


# Social Links

The Social Links tab can be found next to profile

In this setting people can find additional links when wanting to learn more about your booth. Be sure to fill it when people want to know all about you and your project!

<figure><img src="https://2077032912-files.gitbook.io/~/files/v0/b/gitbook-x-prod.appspot.com/o/spaces%2FeeCKjsN28y6WnfmlSN8M%2Fuploads%2FrTO2rNaISioGg35aqLZd%2Fimage_2022-10-26_123851258.png?alt=media&amp;token=7573d6fe-2631-4962-8eae-deb2b145f479" alt=""><figcaption></figcaption></figure>


# Images

Soon To Come

<figure><img src="https://2077032912-files.gitbook.io/~/files/v0/b/gitbook-x-prod.appspot.com/o/spaces%2FeeCKjsN28y6WnfmlSN8M%2Fuploads%2FmwW69MdkXDEmLnqZ5z31%2Fimage_2022-10-26_124034971.png?alt=media&amp;token=57655d81-59b3-4664-8927-e6dfb18b6dcc" alt=""><figcaption><p>Soon To Come</p></figcaption></figure>


# Videos

Will be available soon!

<figure><img src="https://2077032912-files.gitbook.io/~/files/v0/b/gitbook-x-prod.appspot.com/o/spaces%2FeeCKjsN28y6WnfmlSN8M%2Fuploads%2FucHoHqBkEzTLARGGLGDq%2Fimage_2022-10-26_124106871.png?alt=media&amp;token=c98b8b48-b296-440d-af51-d5a214275984" alt=""><figcaption><p>Will be Available Soon!</p></figcaption></figure>


# Features

This Option Can be found under the profile in the left hand menu highlighted in Purple

There is no features to **Feature** will be available in a future update! (1.1.0)

<figure><img src="https://2077032912-files.gitbook.io/~/files/v0/b/gitbook-x-prod.appspot.com/o/spaces%2FeeCKjsN28y6WnfmlSN8M%2Fuploads%2FUZXRozVxHHdUWoZKNJUr%2Fimage_2022-10-26_124158528.png?alt=media&amp;token=520448c9-8c1b-4a83-9e44-60633bc9009a" alt=""><figcaption></figcaption></figure>


# Analytics

In this page you can see all activity regarding your booth!&#x20;

This page will be available as soon as we have events!

<figure><img src="https://2077032912-files.gitbook.io/~/files/v0/b/gitbook-x-prod.appspot.com/o/spaces%2FeeCKjsN28y6WnfmlSN8M%2Fuploads%2FisrNhDnUH57QVcGwmw2A%2Fimage_2022-10-26_130739257.png?alt=media&amp;token=d8a4e9a4-7a3a-4c04-94d9-e5e27332a466" alt=""><figcaption></figcaption></figure>


# General

In the General section found under analytics highlighted in purple on the left side menu

You can find the status of your booth which will change as you enter and submit your booth into events.

You can also delete your organizations' booth here.

And of course your booths ID

<figure><img src="https://2077032912-files.gitbook.io/~/files/v0/b/gitbook-x-prod.appspot.com/o/spaces%2FeeCKjsN28y6WnfmlSN8M%2Fuploads%2FZyG1dDgMswoiUbA7mOeD%2Fimage_2022-10-26_130904260.png?alt=media&amp;token=f6ef5f18-bd00-4559-aa8b-5a9ecdfb47ee" alt=""><figcaption></figcaption></figure>


# Billing

Coming Soon!

<figure><img src="https://2077032912-files.gitbook.io/~/files/v0/b/gitbook-x-prod.appspot.com/o/spaces%2FeeCKjsN28y6WnfmlSN8M%2Fuploads%2FiNxNbrhz3bJtoaH7mC5b%2Fimage_2022-10-26_131103130.png?alt=media&amp;token=78b8b491-5c17-45ce-9b98-f7a195b44915" alt=""><figcaption><p>Coming Soon!</p></figcaption></figure>


# 4. Assigning Team

Assigning your team is a crucial responsibility that the organization founder and booth creator needs to do.

There are three different types of roles, with their respective duty.

[Owner](/exhibitors/how-to-be-an-exhibitor/4.-assigning-team/owner), [Manager](/exhibitors/how-to-be-an-exhibitor/4.-assigning-team/manager), and [Representative](/exhibitors/how-to-be-an-exhibitor/4.-assigning-team/representative)

(Image)


# Inviting Members

In the Main Menu you will find your organization in the left side menu. After selecting your organization you will be taken to general, but the option we are looking for is team which is found next to general.

Here is where you will invite your team, as soon as an update comes you can invite your team!

<figure><img src="https://2077032912-files.gitbook.io/~/files/v0/b/gitbook-x-prod.appspot.com/o/spaces%2FeeCKjsN28y6WnfmlSN8M%2Fuploads%2FeR8ZA00xSsvVwOrnWvrZ%2Fimage_2022-10-26_131318078.png?alt=media&amp;token=2e10ca3a-6645-4a60-8b42-87394b4d8979" alt=""><figcaption></figcaption></figure>


# Owner

The Role of an owner

The Owner is the founder of the Organization or Booth.


# Manager

The Manager Role

A manager will have as might rights as a owner except with the ability to delete.


# Representative

The Representative role

A representative is set to be the face of your booth, he will handle speaking, and being in your booth during the metaconference.


# 5. Customizing Booth

We give full access and the capabilities to costumize a booth to your liking!

This step provides which capabilities we hold to costomize your booth

[Colors](/exhibitors/how-to-be-an-exhibitor/5.-customizing-booth/colors)

[Images](/exhibitors/how-to-be-an-exhibitor/5.-customizing-booth/images)

[Videos](/exhibitors/how-to-be-an-exhibitor/5.-customizing-booth/videos)

[Choosing Booth Location](/exhibitors/how-to-be-an-exhibitor/5.-customizing-booth/choosing-booth-location)

[Different Size Booths](/exhibitors/how-to-be-an-exhibitor/5.-customizing-booth/different-size-booths)

[Minting Machine](/exhibitors/how-to-be-an-exhibitor/5.-customizing-booth/minting-machine)

<figure><img src="https://2077032912-files.gitbook.io/~/files/v0/b/gitbook-x-prod.appspot.com/o/spaces%2FeeCKjsN28y6WnfmlSN8M%2Fuploads%2FDHdNshyldzU3nM3NNLcN%2FColors.PNG?alt=media&amp;token=1bfe3c67-9ef4-4845-bb88-27b72af85df2" alt=""><figcaption></figcaption></figure>


# Colors

To Begin customizing your booth for your organization you will need to go into your booth found In the left menu highlighted in purple inside the main menu. Then click your booth.

<figure><img src="https://2077032912-files.gitbook.io/~/files/v0/b/gitbook-x-prod.appspot.com/o/spaces%2FeeCKjsN28y6WnfmlSN8M%2Fuploads%2Fg6vl9ixigBeksAX6mLtN%2FExhibitor%20booths.PNG?alt=media&amp;token=ba5fbe09-b1d9-47d1-8a75-84e74e08afb0" alt=""><figcaption></figcaption></figure>

After clicking your booth you will be meet with a clean slate, this is the stock booth given.&#x20;

To begin customizing the colors for your booth head into the "Colors" option in the second menu.

After opening it you will see 5 options to change, as you change the options you will see what it affects. There is also a color picker option to guarantee you have the same color for each section. Be sure to explore the options and see what fits best for you!

<figure><img src="https://2077032912-files.gitbook.io/~/files/v0/b/gitbook-x-prod.appspot.com/o/spaces%2FeeCKjsN28y6WnfmlSN8M%2Fuploads%2FQBtG4RCciyqXEXA5bw3p%2FColors.PNG?alt=media&amp;token=3b5c8a1c-53ee-4abe-b584-07e595c5d5c5" alt=""><figcaption></figcaption></figure>


# Images

The next unique customization we provide for each booth is images.

As you can see in the booth I have an image for my space pirates!

You can find this option in the "Artwork" option and a dropdown menu will be shown.&#x20;

Each panel has a size dependent on the canvas in the booth.

| Left and Right Wall | Max 2MB   |
| ------------------- | --------- |
| Back Wall           | Max 3MB   |
| Upload Desk         | Max 1MB   |
| Skybox              | Max 1.5MB |
| Logo                | Max 500KB |

<figure><img src="https://2077032912-files.gitbook.io/~/files/v0/b/gitbook-x-prod.appspot.com/o/spaces%2FeeCKjsN28y6WnfmlSN8M%2Fuploads%2FyJ3d3wWpxQrAaeu8qYBE%2Fimage_2022-10-26_132923159.png?alt=media&amp;token=9d65bf68-1466-44af-80fe-177c6a46aeb6" alt=""><figcaption></figcaption></figure>


# Videos

Videos can be played live while in the metaverse and repeatedly!

This gives a short visual of your project on whatever you would like to show

The option is found at the bottom and will give a drop down menu

The Video on the left is longer than the one on the right, Max 10MB

Video on the right side is 500KB

<figure><img src="https://2077032912-files.gitbook.io/~/files/v0/b/gitbook-x-prod.appspot.com/o/spaces%2FeeCKjsN28y6WnfmlSN8M%2Fuploads%2FioMPSLBIkExxN2RS95PR%2FVideo%20left.PNG?alt=media&amp;token=fa76653b-f786-44f7-a8cc-32b7cdf40030" alt=""><figcaption></figcaption></figure>


# Choosing Booth Location

If you would like your booth in certain spot you are unable to choose where to put it.

This decision is left to the host to decide where everyones booth will be located, you can of course talk to the host and ask!

<figure><img src="https://2077032912-files.gitbook.io/~/files/v0/b/gitbook-x-prod.appspot.com/o/spaces%2FeeCKjsN28y6WnfmlSN8M%2Fuploads%2Fj75G0XYVAGG3qX3vRYrR%2FSkybox.PNG?alt=media&amp;token=944467b0-5e92-464d-a1a4-456380b7d0c4" alt=""><figcaption></figcaption></figure>


# Different Size Booths

You are able to change the size of your booth!

This option will be available soon and will come with more customizations (Images, Videos, logos, colors)

<figure><img src="https://2077032912-files.gitbook.io/~/files/v0/b/gitbook-x-prod.appspot.com/o/spaces%2FeeCKjsN28y6WnfmlSN8M%2Fuploads%2FlqqTfdtrbZs8XRNLsqOB%2FSize%20Booth.PNG?alt=media&amp;token=28664883-08ef-46bd-b0a3-4b2b49ced45d" alt=""><figcaption></figcaption></figure>


---

[Next Page](/llms-full.txt/1)